How to Add an AI Chatbot to WordPress in Under 2 Minutes (Free Plugin)
Adding an AI chatbot to WordPress sounds technical. It isn't. With Chat Cobalt you sign up, install a free WordPress chatbot plugin, and your website starts answering customers by itself, day and night, using your own prices, services and opening hours. No coding, no developer, no training the bot yourself.
Watch the whole thing above in under 2 minutes, or follow the steps below. Every step has a screenshot, so you always know exactly where to click.
What you need before you start
- A WordPress website where you can log in as an administrator (you can see Plugins in the left menu).
- Your website address, for example
yourbakery.com. - An email address. That's it. The 30-day free trial needs no credit card.
Part 1: Create your free Chat Cobalt account
This part takes about a minute. While you fill it in, the AI reads your website and learns what your business does.
Step 1: Start your free trial
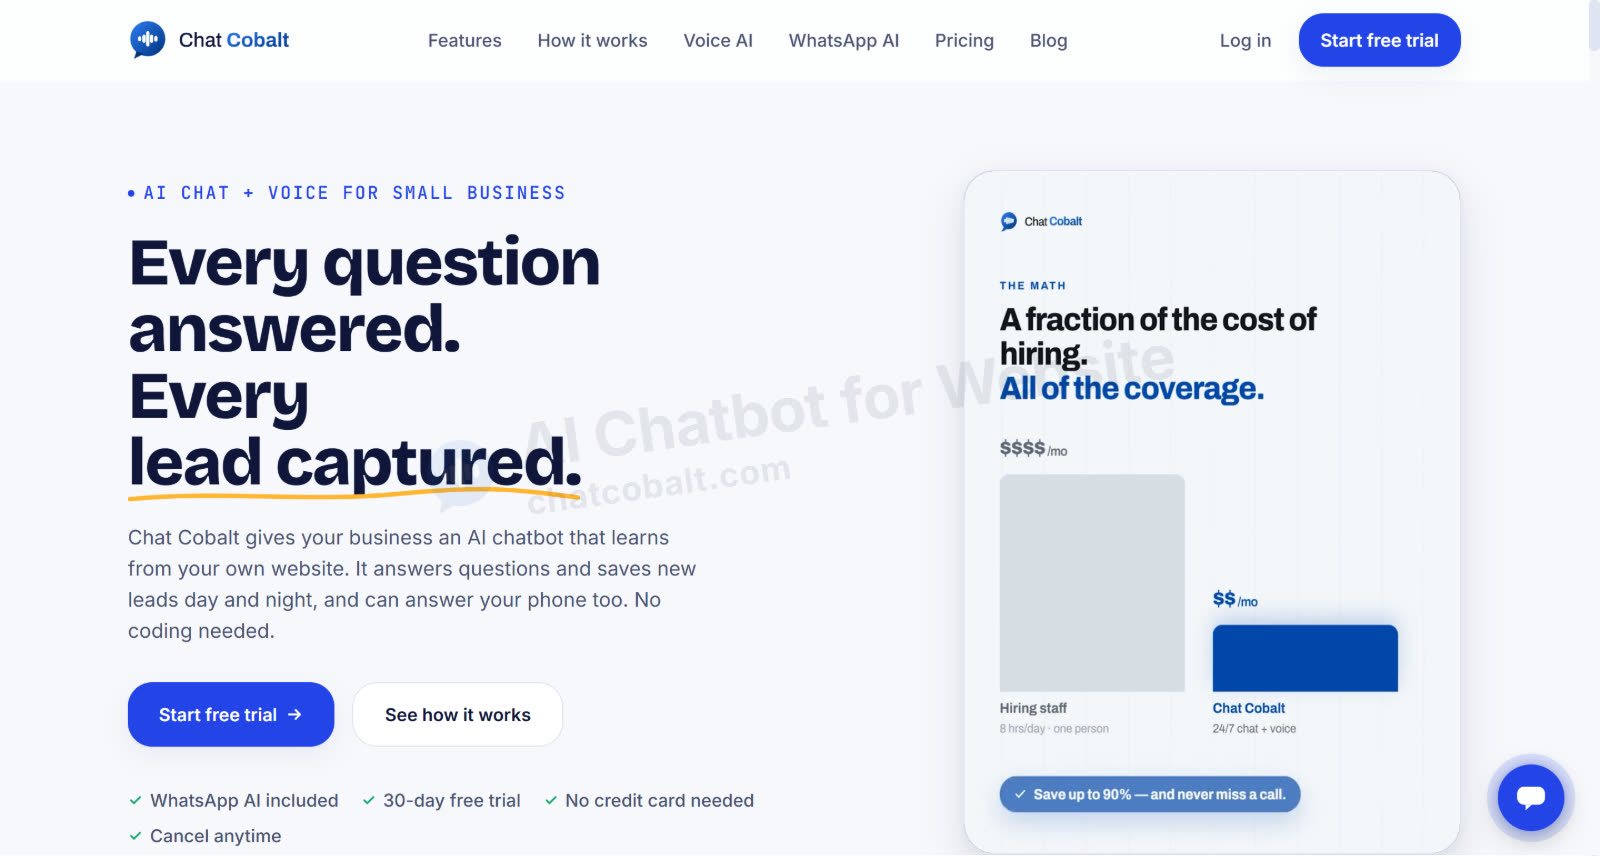
Go to chatcobalt.com and click Start free trial.
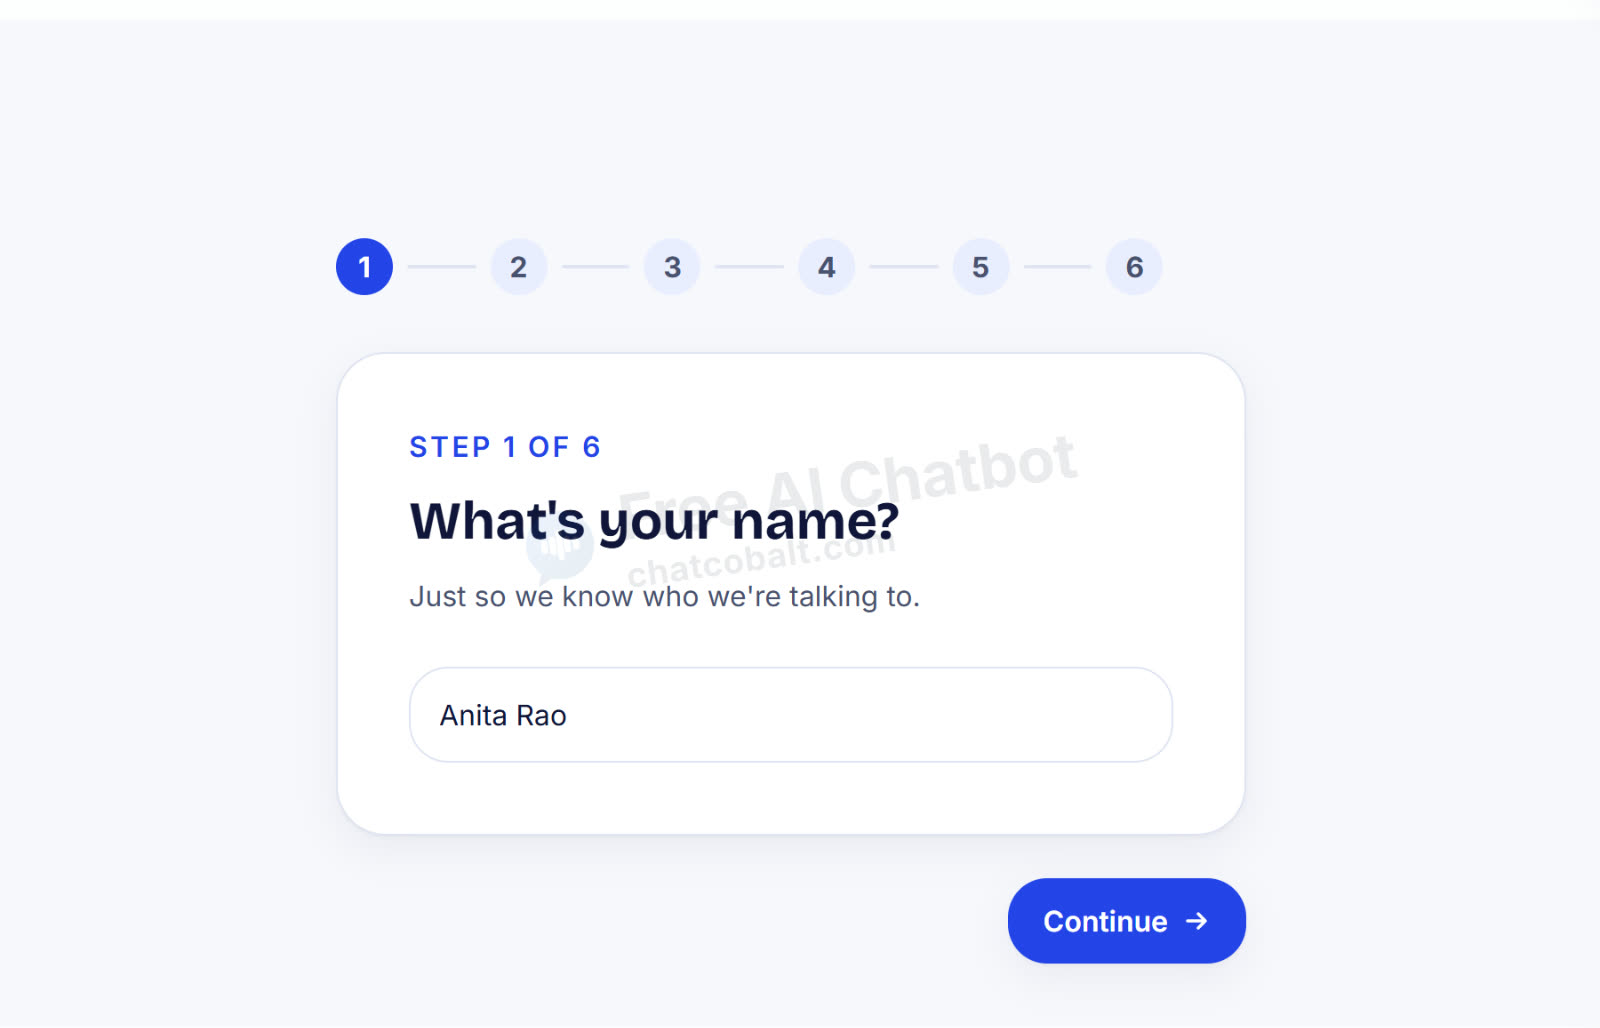
Step 2: Type your name
Just your first and last name, so we know who we're talking to.
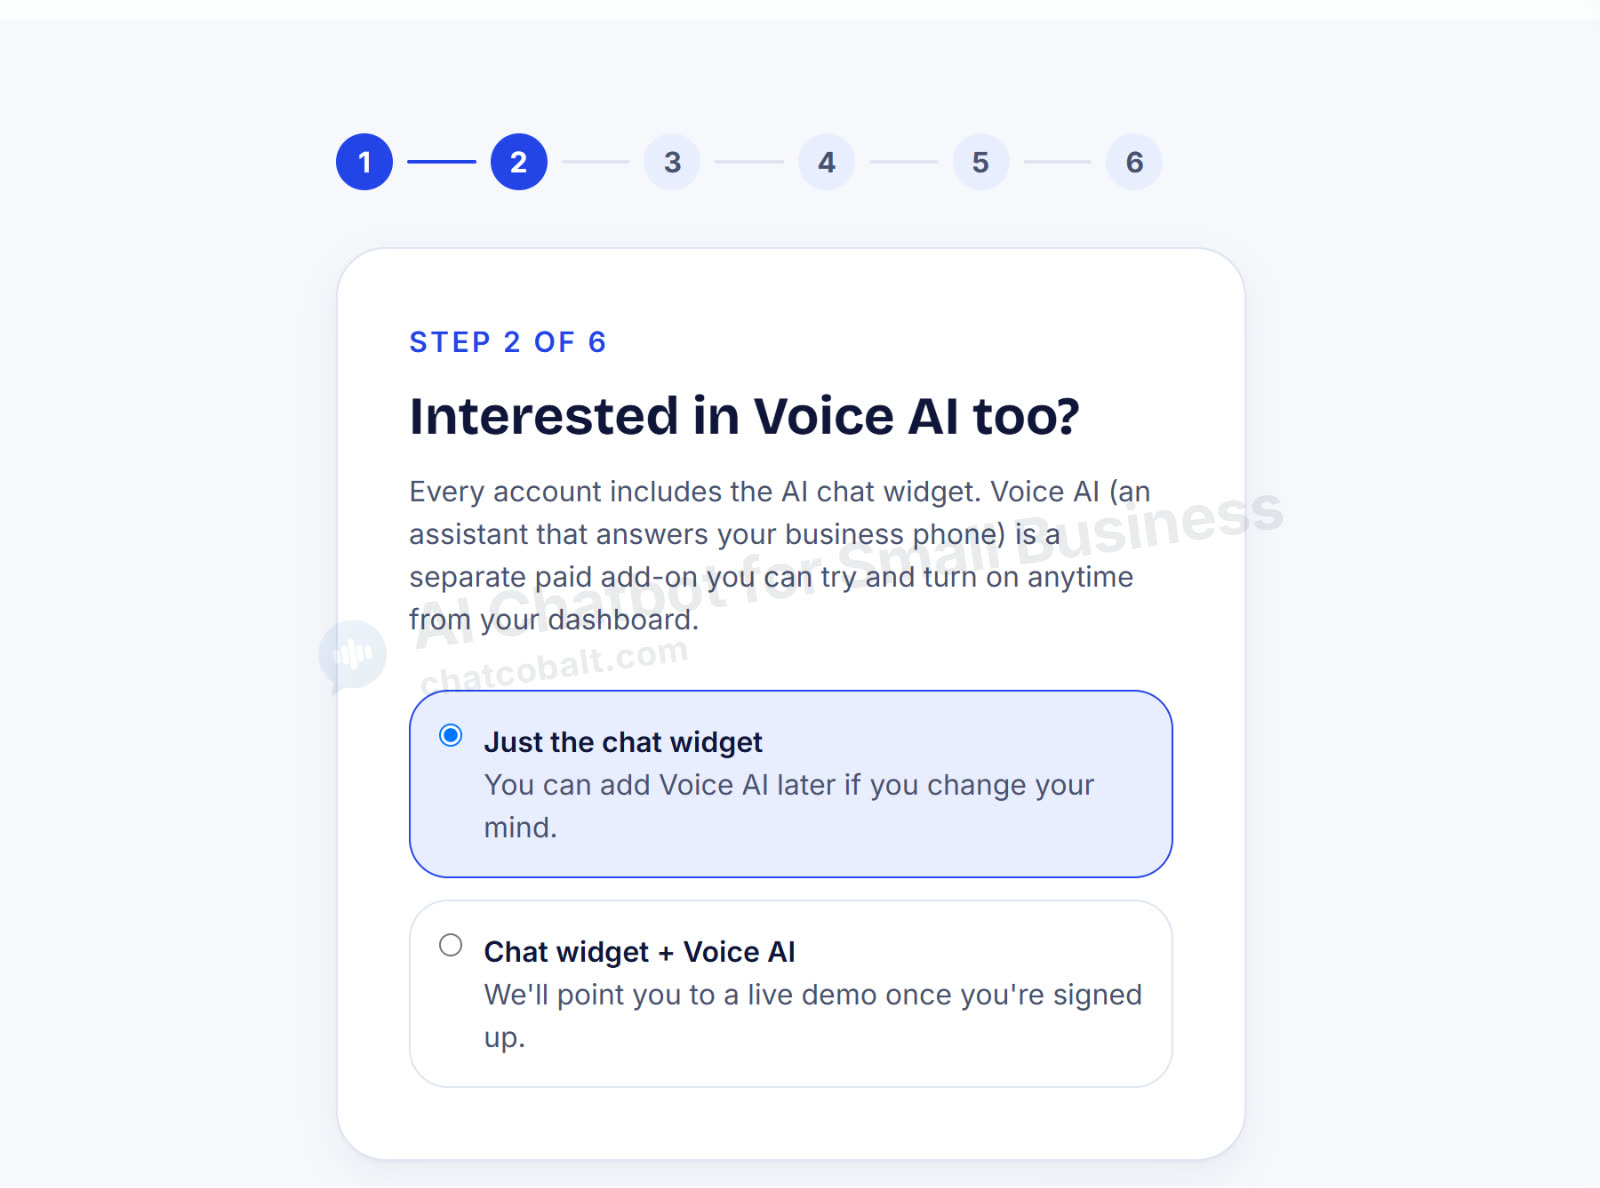
Step 3: Pick the chat widget
Choose Just the chat widget. You can add Voice AI (an assistant that answers your business phone) later if you ever want it.
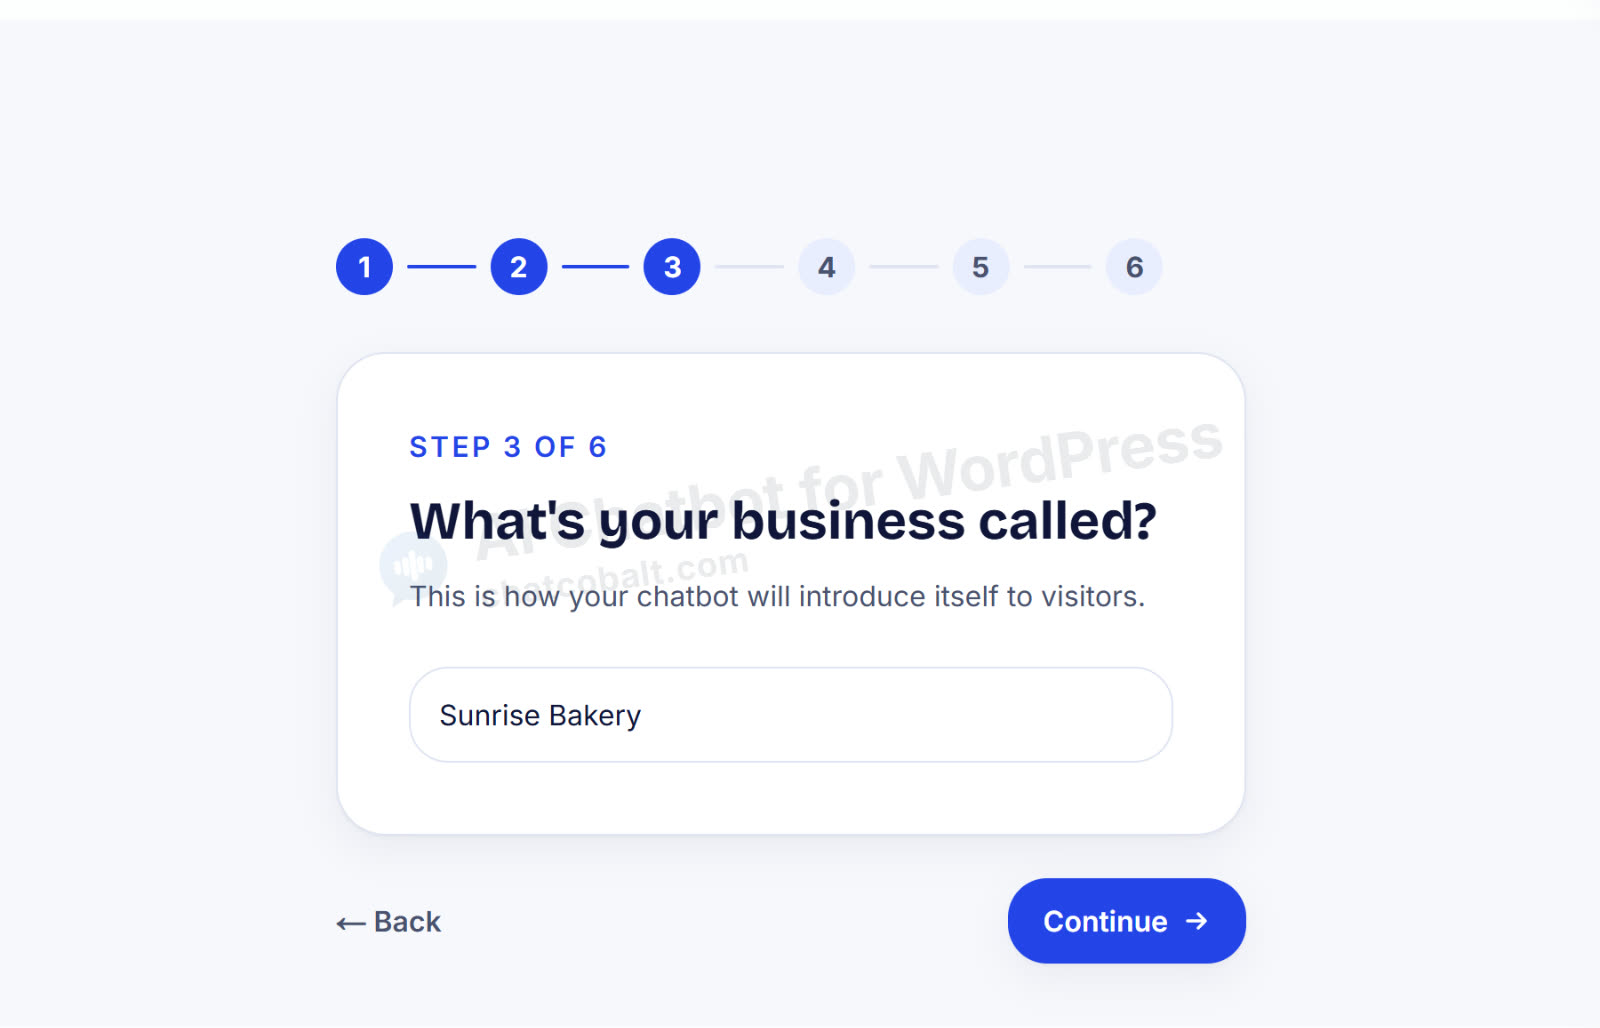
Step 4: Your business name
This is the name your chatbot uses when it introduces itself to visitors, for example "Sunrise Bakery AI chat".
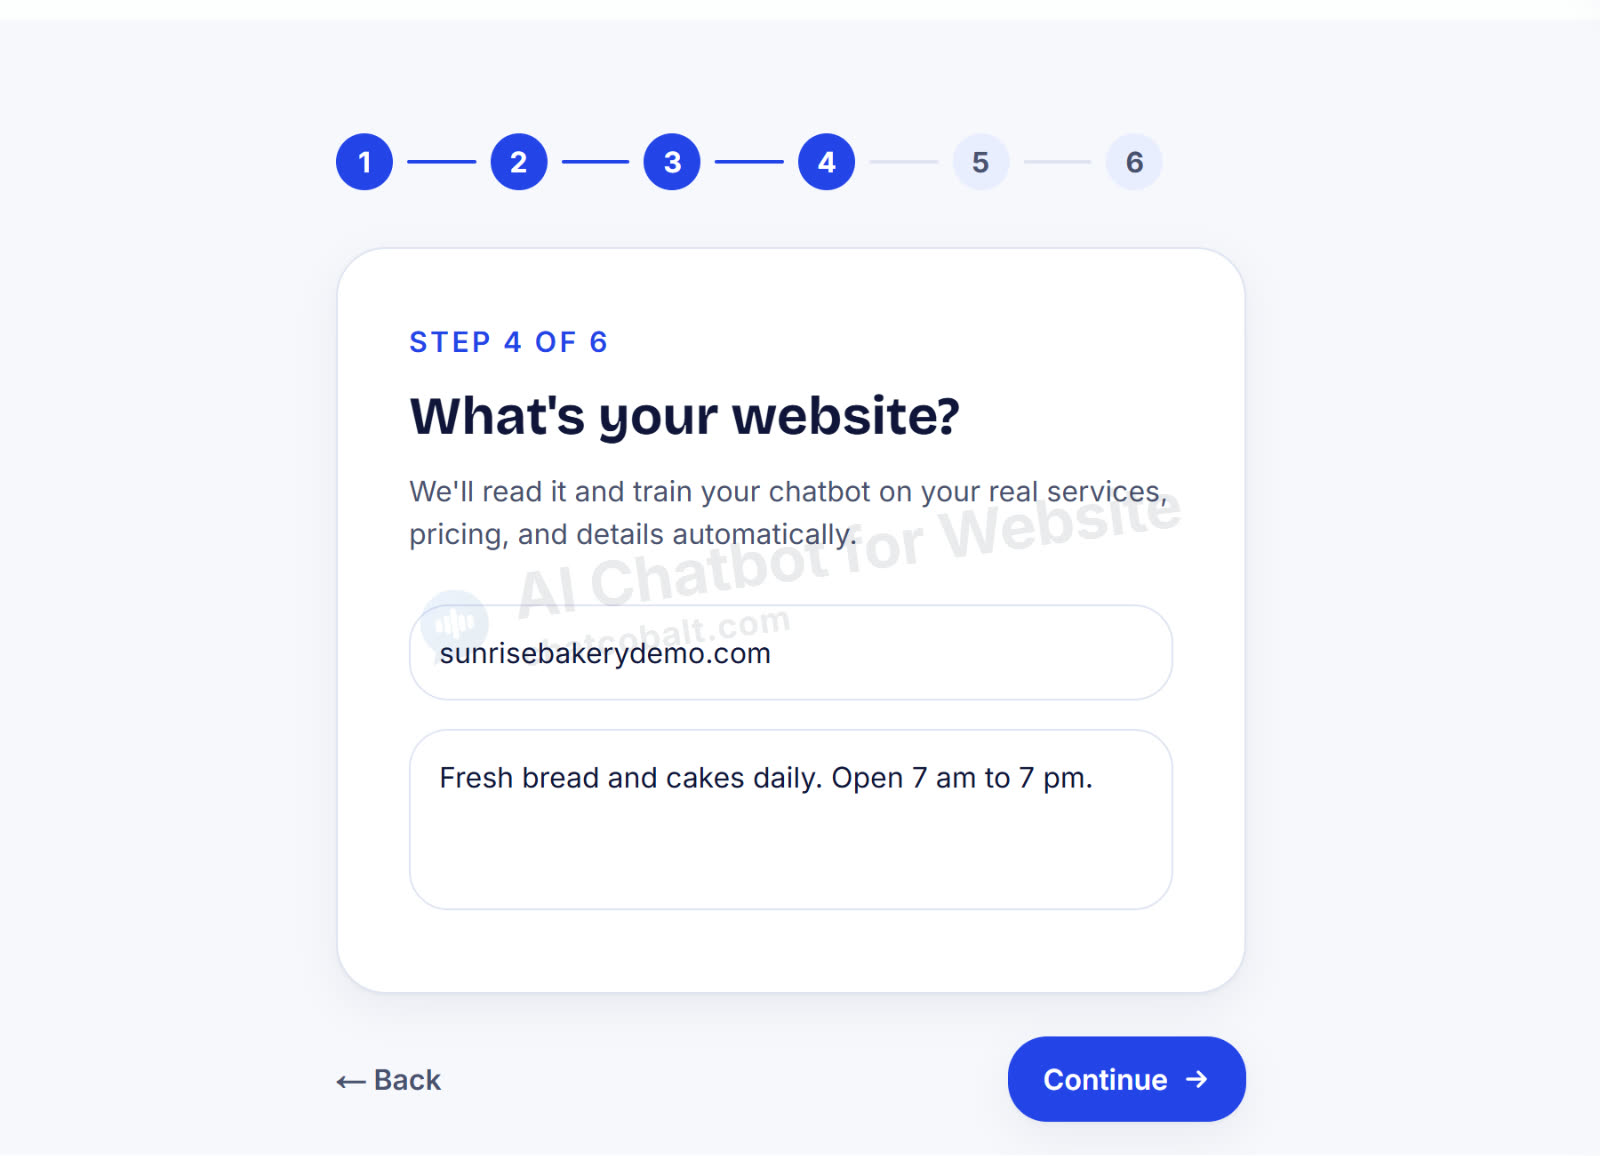
Step 5: Your website address (this is where the magic happens)
Type your website address. The AI reads your website and learns your business: your services, products, prices and contact details. There's also a box for anything your website doesn't say, like "Fresh bread and cakes daily. Open 7 am to 7 pm."
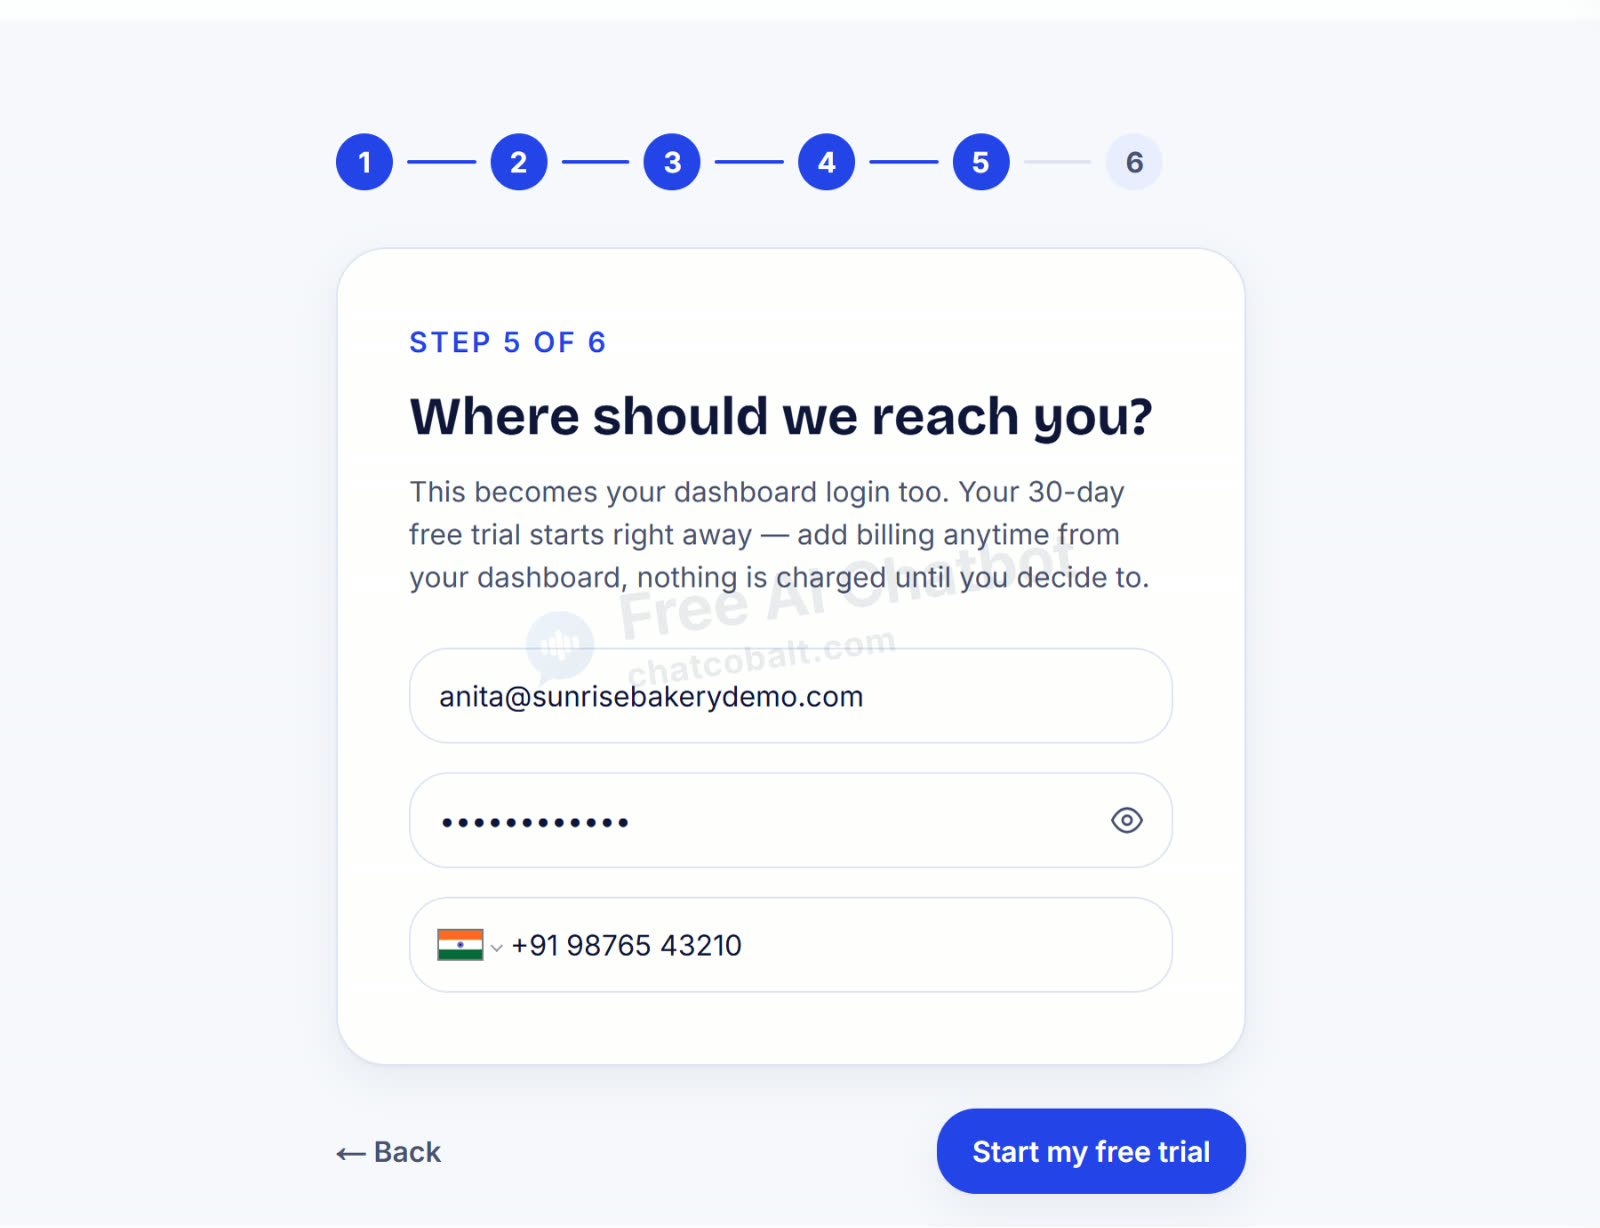
Step 6: Email and password
This becomes your login for the Chat Cobalt dashboard. Your 30-day free trial starts right away and nothing is charged until you decide to add billing.
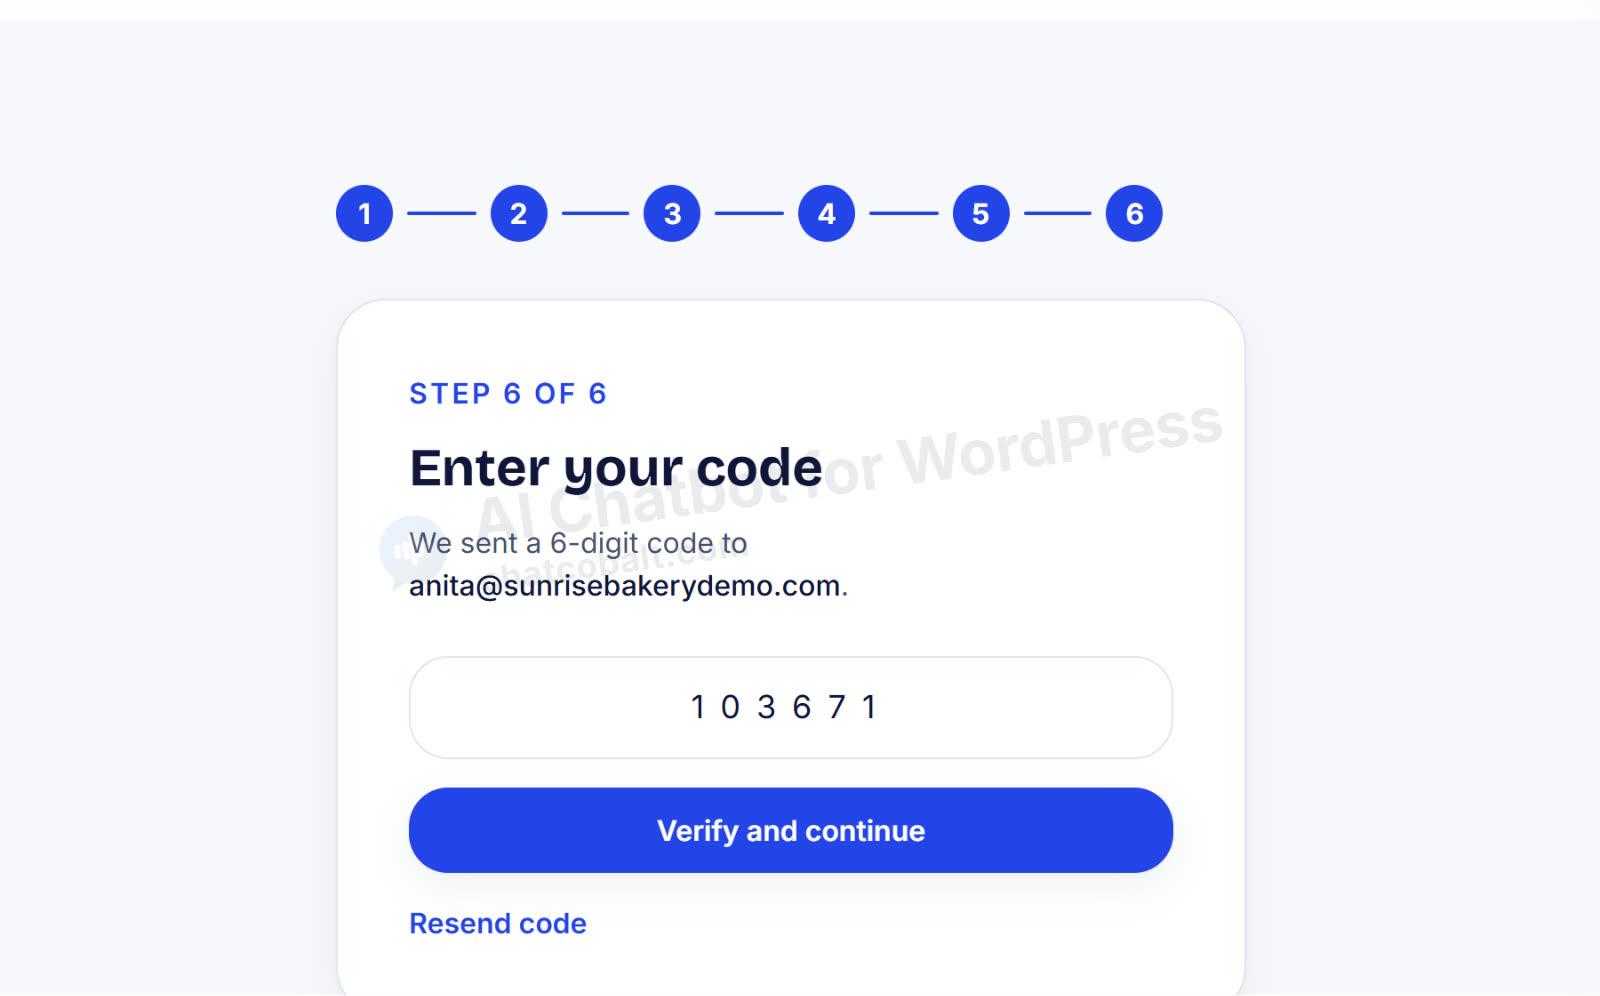
Step 7: Enter the 6-digit code
We email you a 6-digit code to make sure the address is really yours. Type it in and click Verify and continue.
Part 2: Teach your chatbot about your business
Your website is a great start, but a few direct answers make your chatbot much better. Every question here is optional.
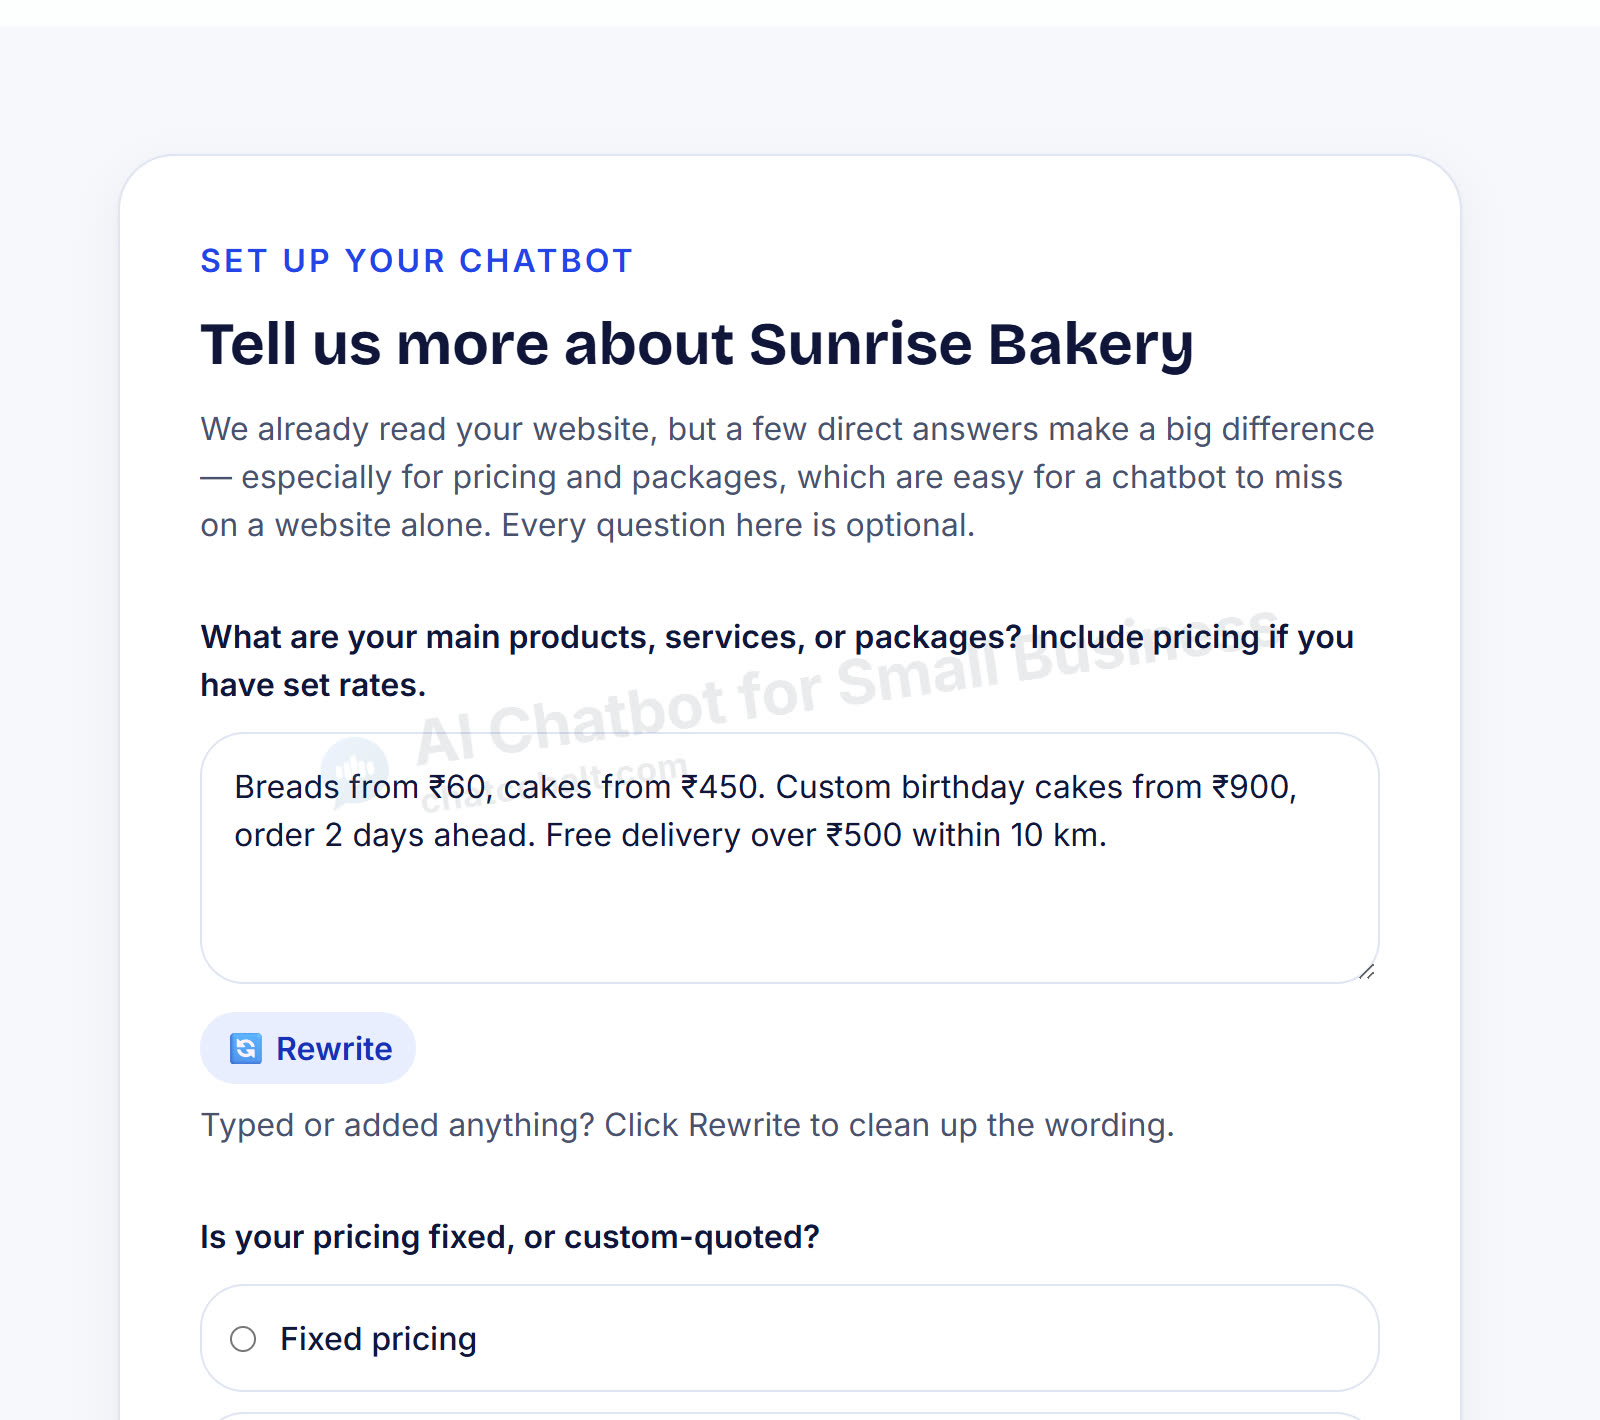
Step 8: Products and prices
Write what you sell and what it costs, in your own words. For example: "Breads from ₹60, cakes from ₹450. Custom birthday cakes from ₹900, order 2 days ahead." Not sure what to write? Press Draft this for me and the AI writes a first version.
Step 9: Pricing type and opening hours
Tell it whether your prices are fixed or quoted, and when you're open. Now the chatbot can say "We're open every day, 7 am to 7 pm" instead of guessing.
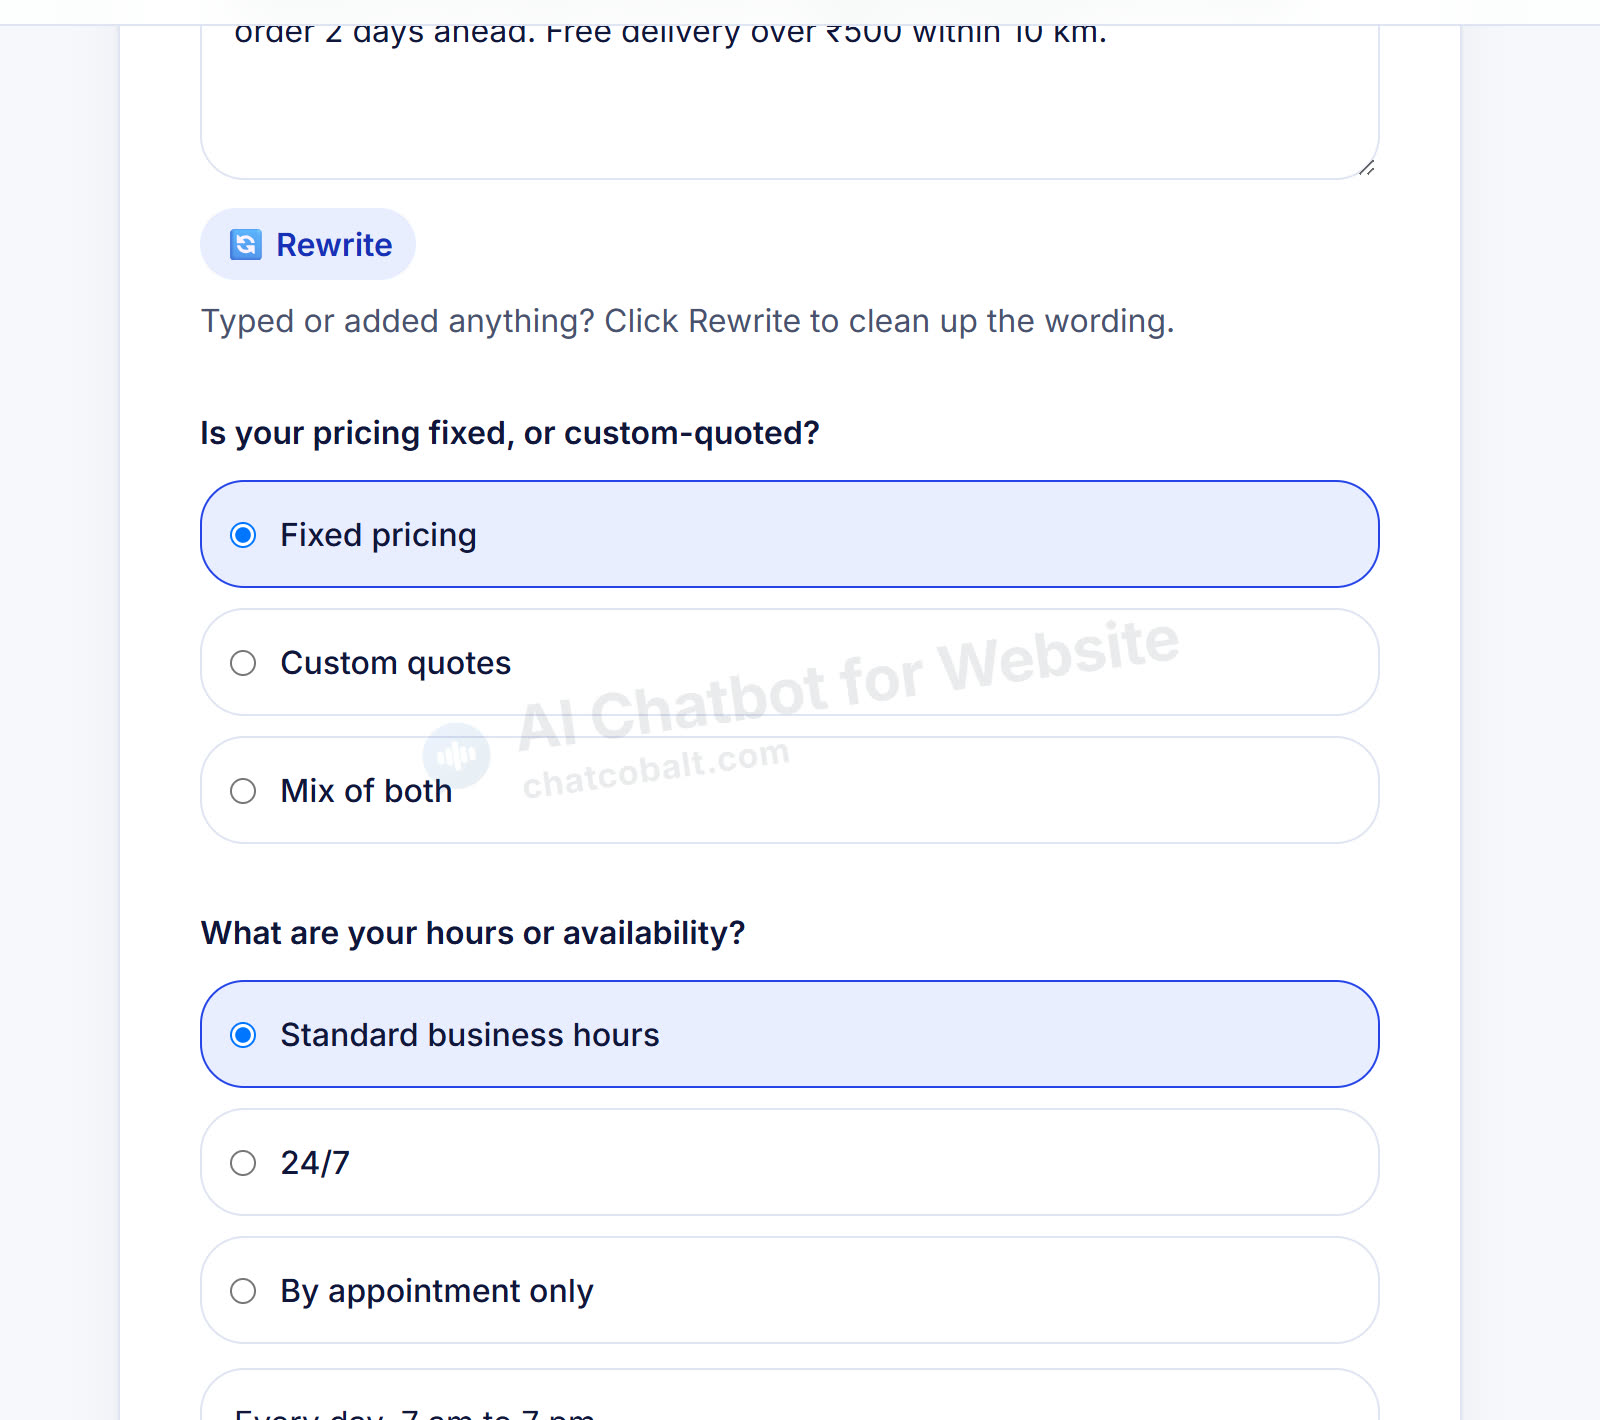
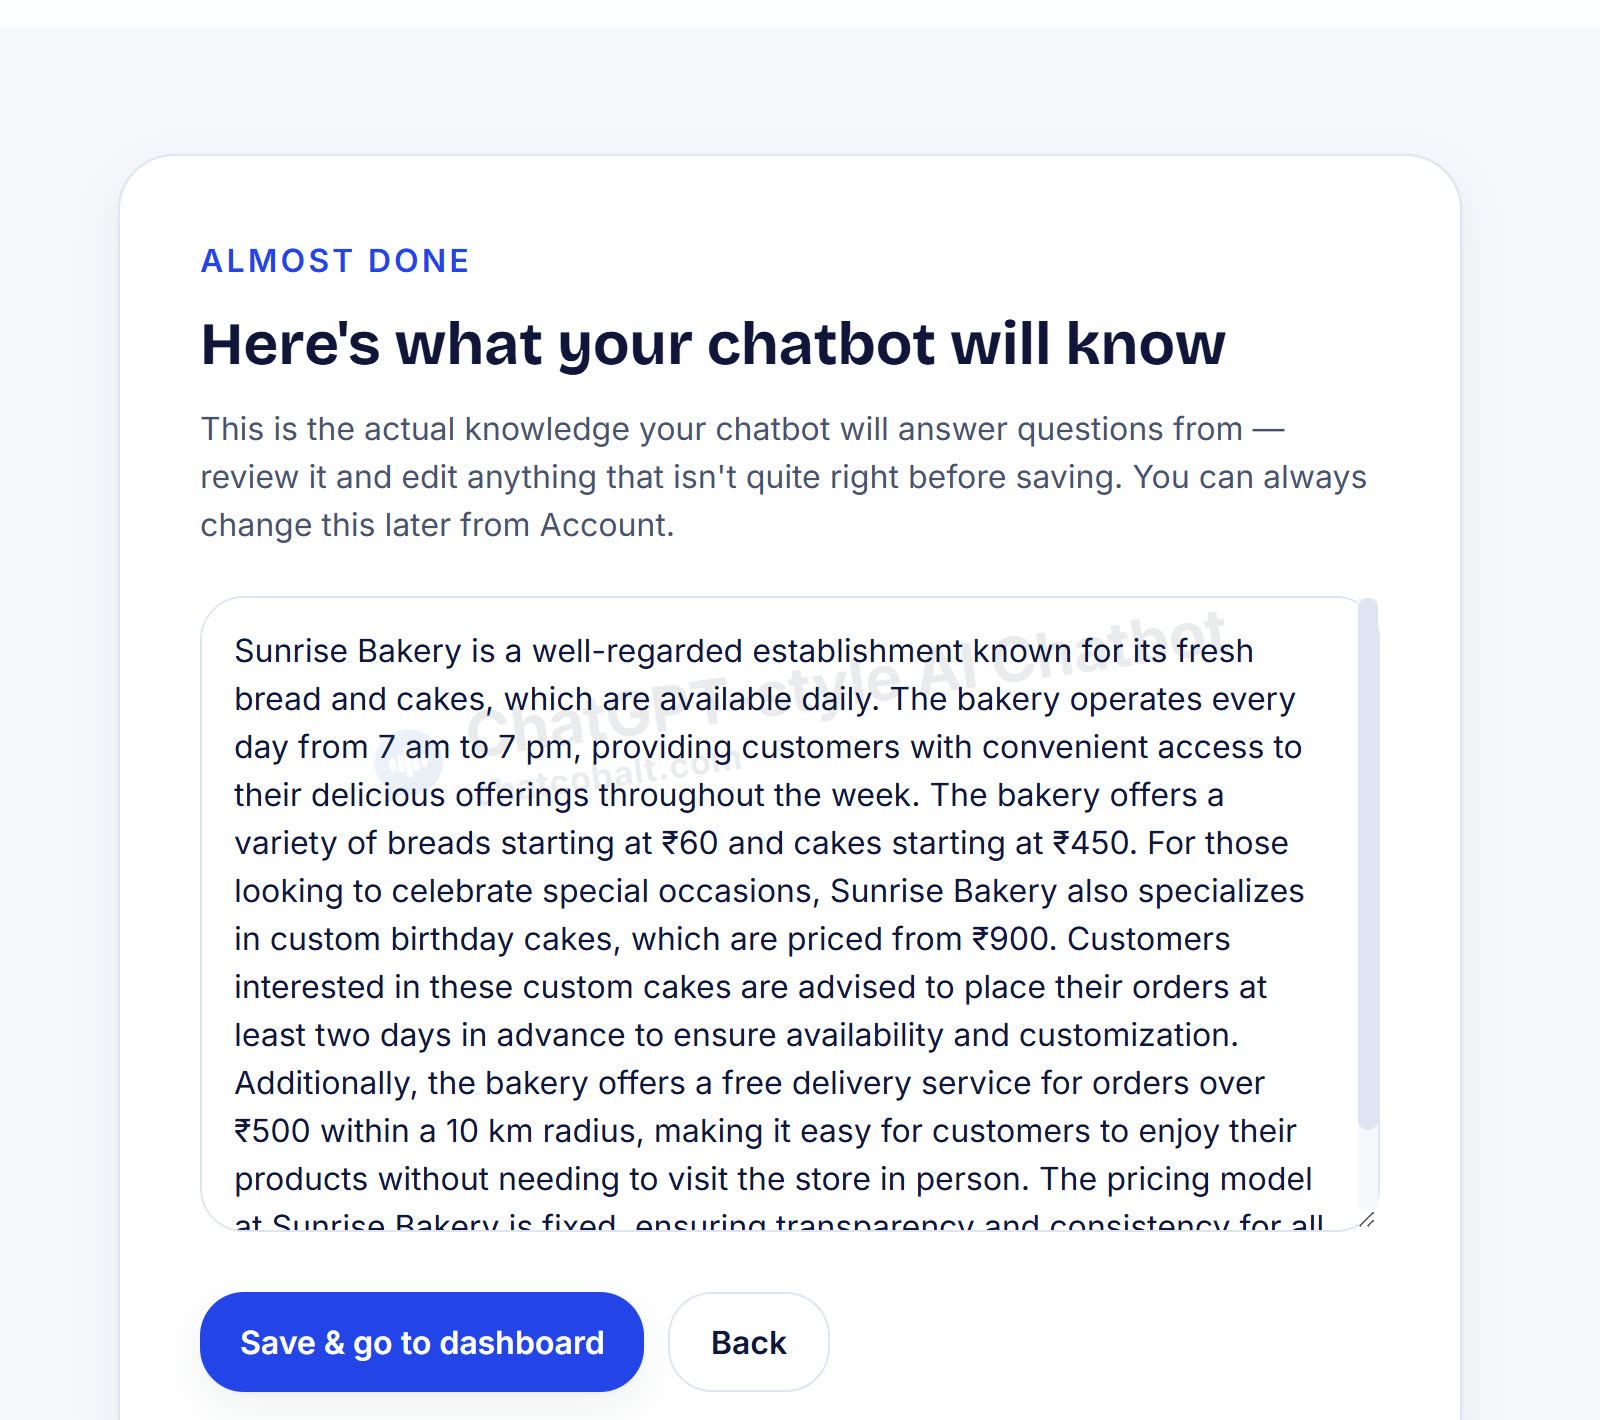
Step 10: Check what the AI wrote, then save
The AI turns everything into your chatbot's knowledge: a short briefing, like one you'd give a new employee. Read it, fix anything that's wrong, and click Save & go to dashboard. You can change it anytime later.
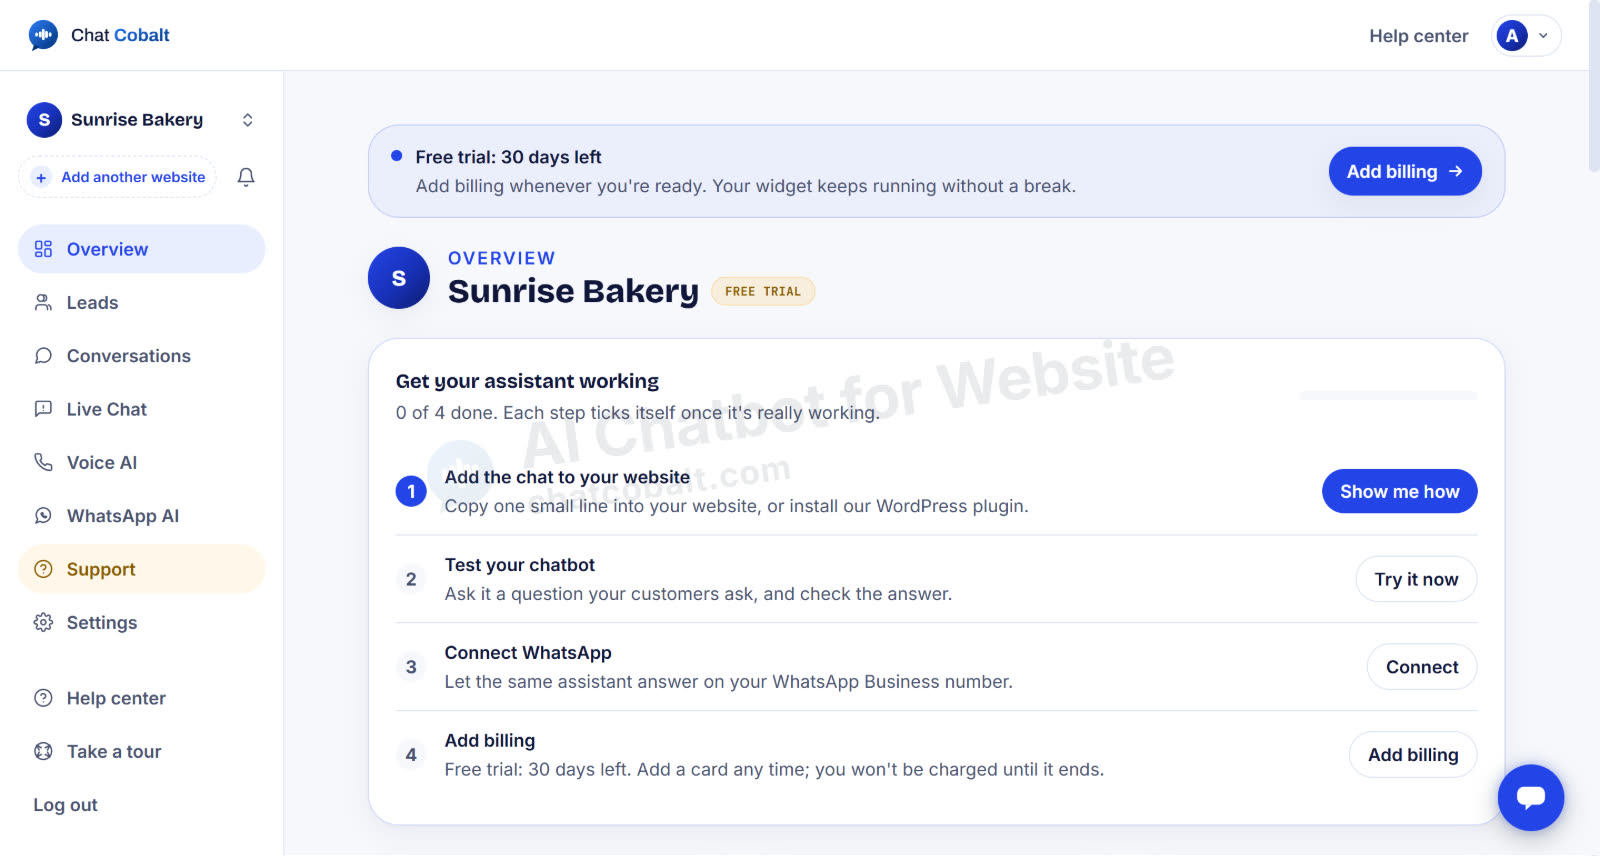
Part 3: Add the chatbot to your WordPress website
Step 11: Your dashboard shows what to do next
Your dashboard has a short setup checklist. The first item is Add the chat to your website. Click Show me how.
Step 12: Choose WordPress and copy your Business ID
Click WordPress. You'll see the steps and Your Business ID, a long code that tells the plugin which chatbot is yours. Click Copy.
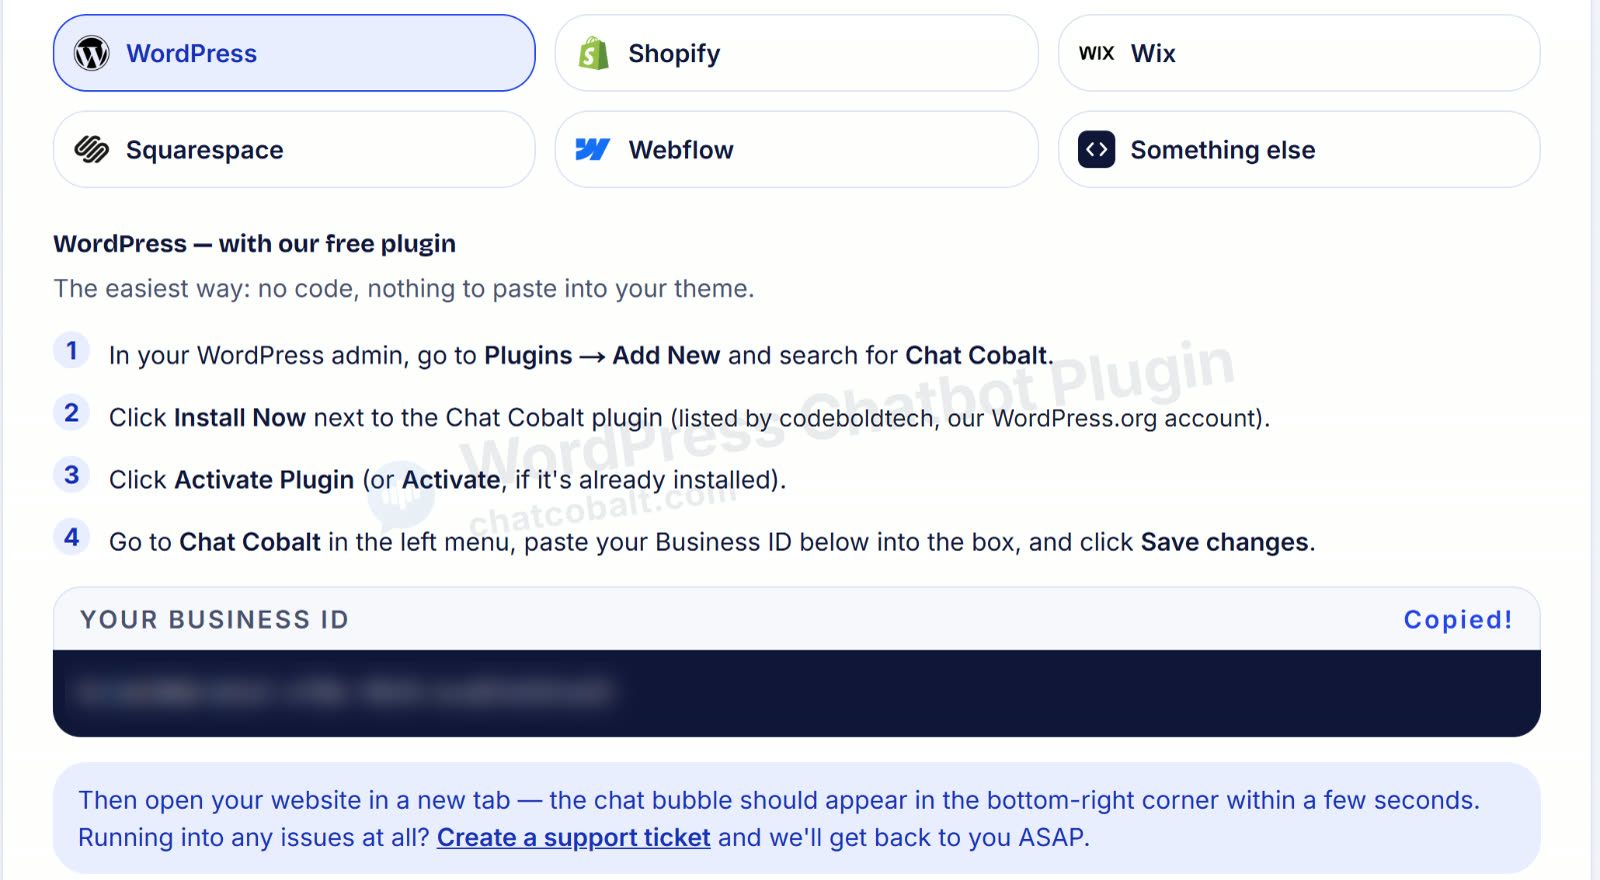
Tip: with the newest version of the plugin you can skip copying altogether. There's a Connect button in the plugin that fills everything in for you. More on that in step 16.
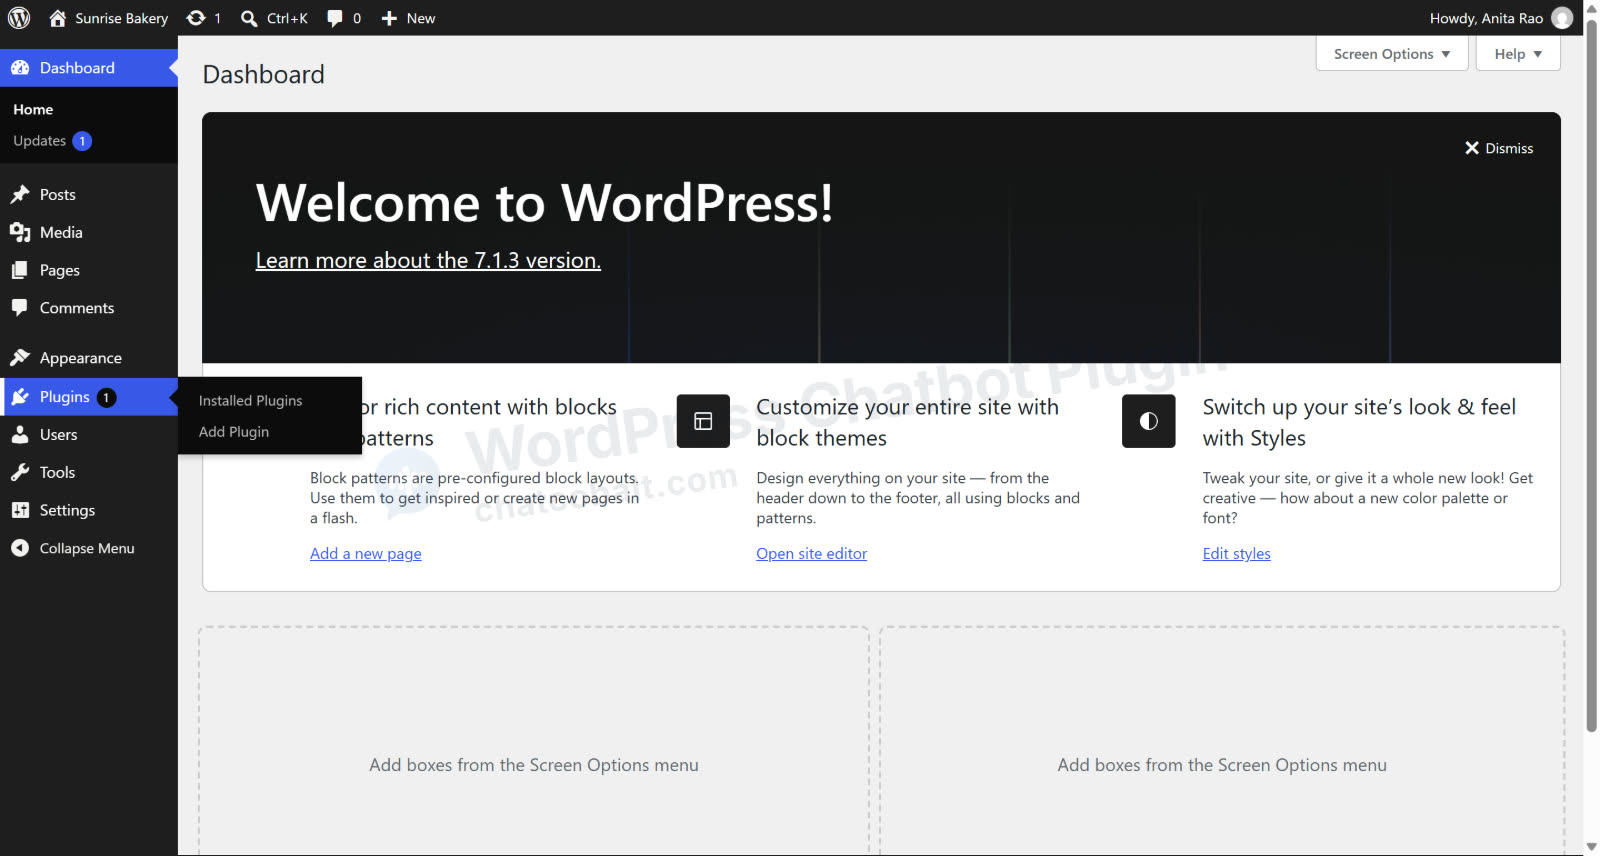
Step 13: In WordPress, go to Plugins → Add Plugin
Log in to your WordPress admin. In the left menu, hover over Plugins and click Add Plugin (on older WordPress versions it says Add New).
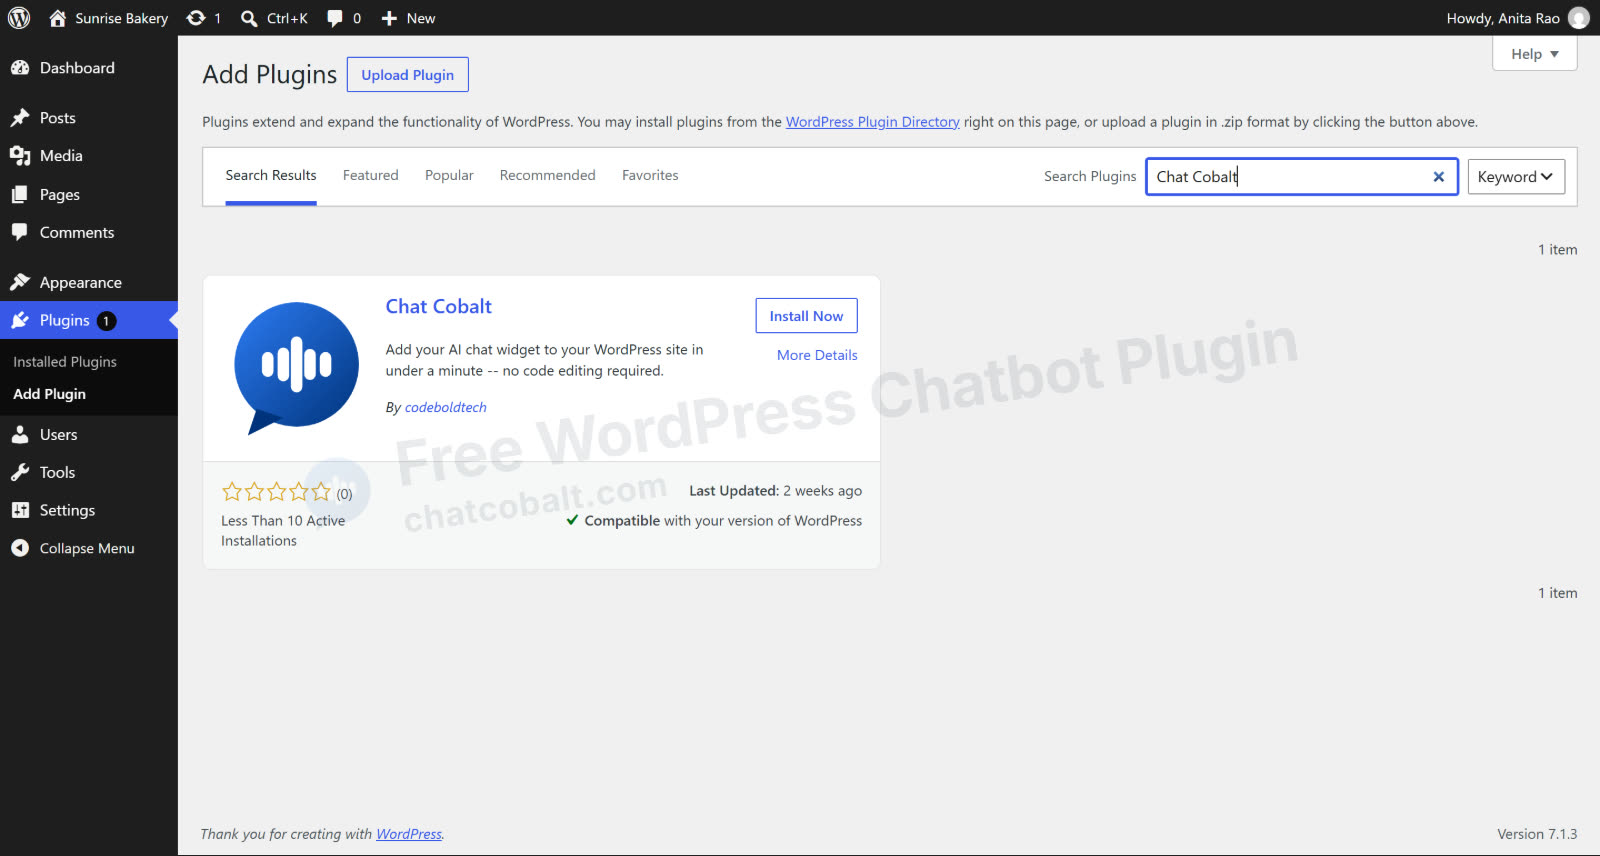
Step 14: Search for "Chat Cobalt" and click Install Now
Type Chat Cobalt in the search box. Our plugin is listed by codeboldtech, our WordPress.org account. Click Install Now.
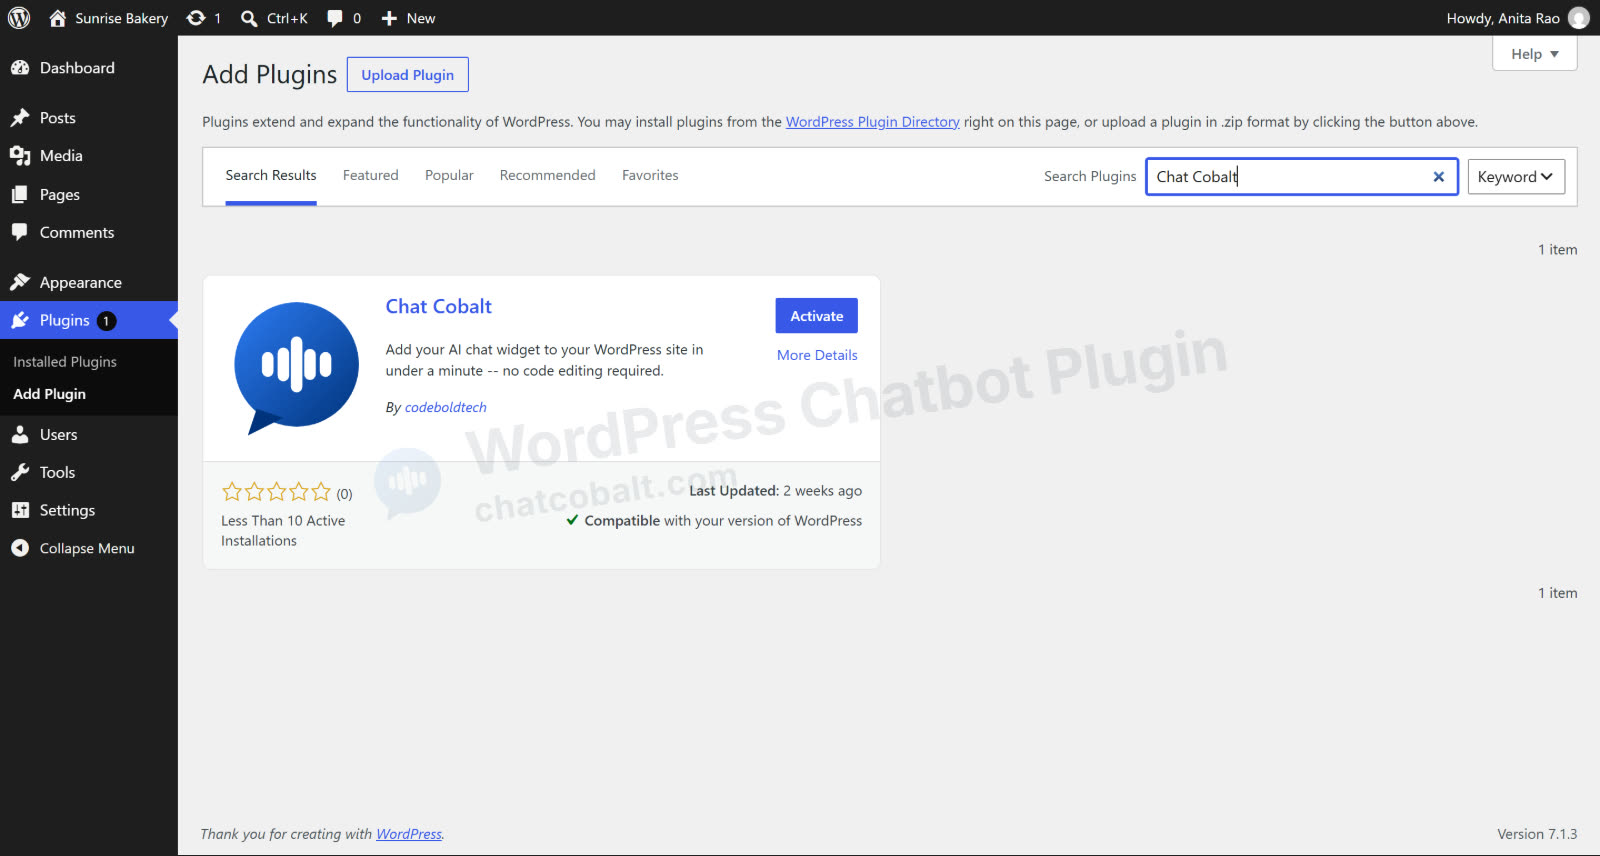
Step 15: Click Activate
When it finishes installing, the button changes to Activate. Click it.
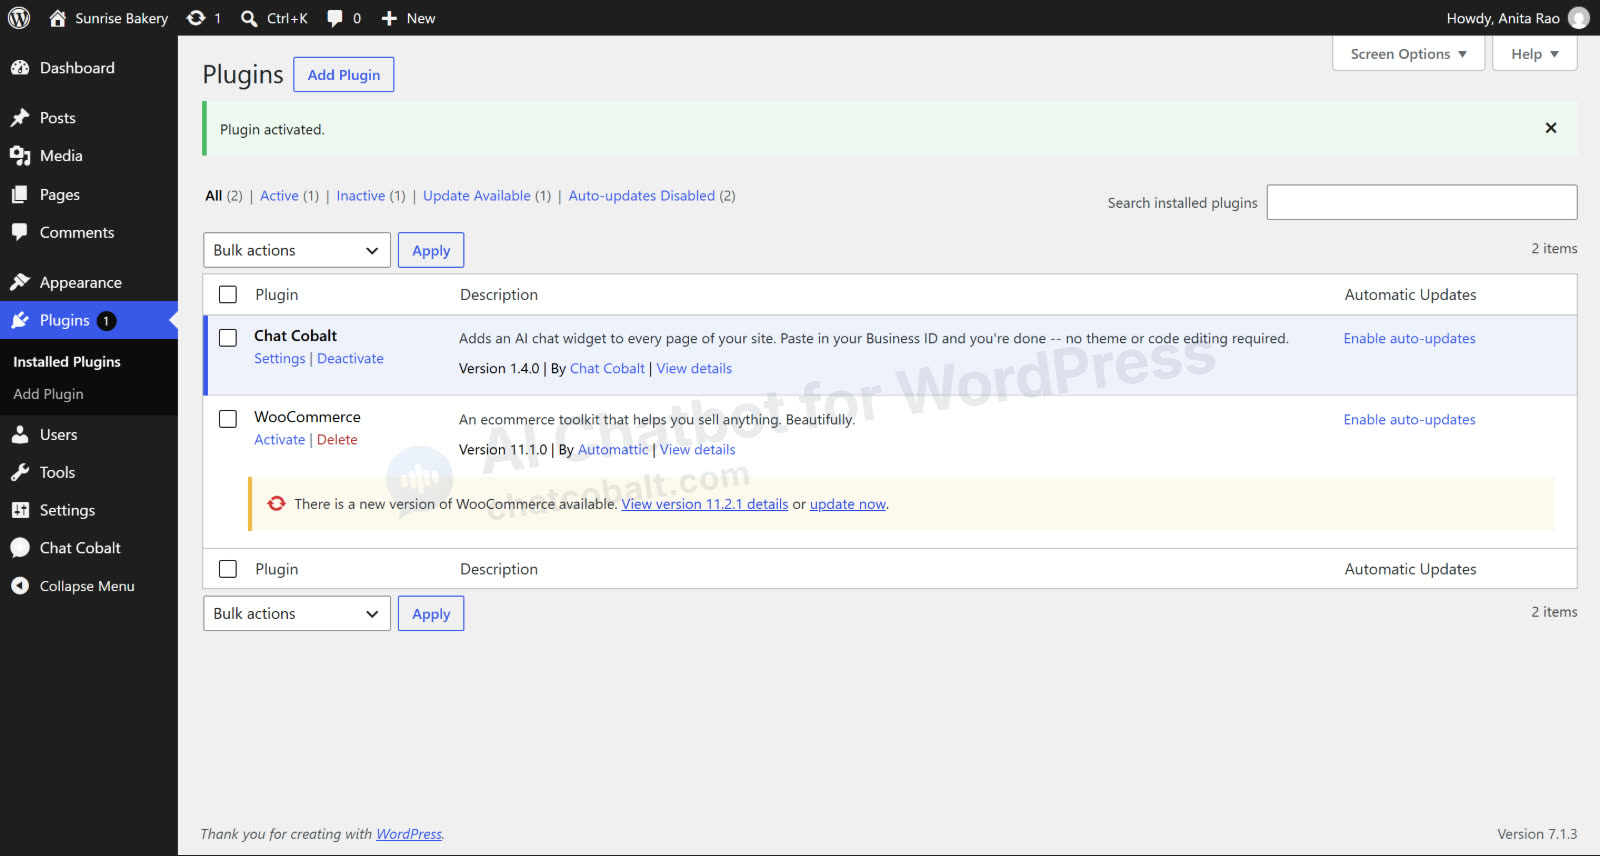
Step 16: Open Chat Cobalt and connect your account
Chat Cobalt now appears in your WordPress left menu. Click it. You have two ways to connect:
- The quick way: press Connect. You'll be asked to log in to Chat Cobalt and approve, then you land back in WordPress with everything filled in.
- The manual way: paste your Business ID (the one you copied in step 12) into the Business ID box.
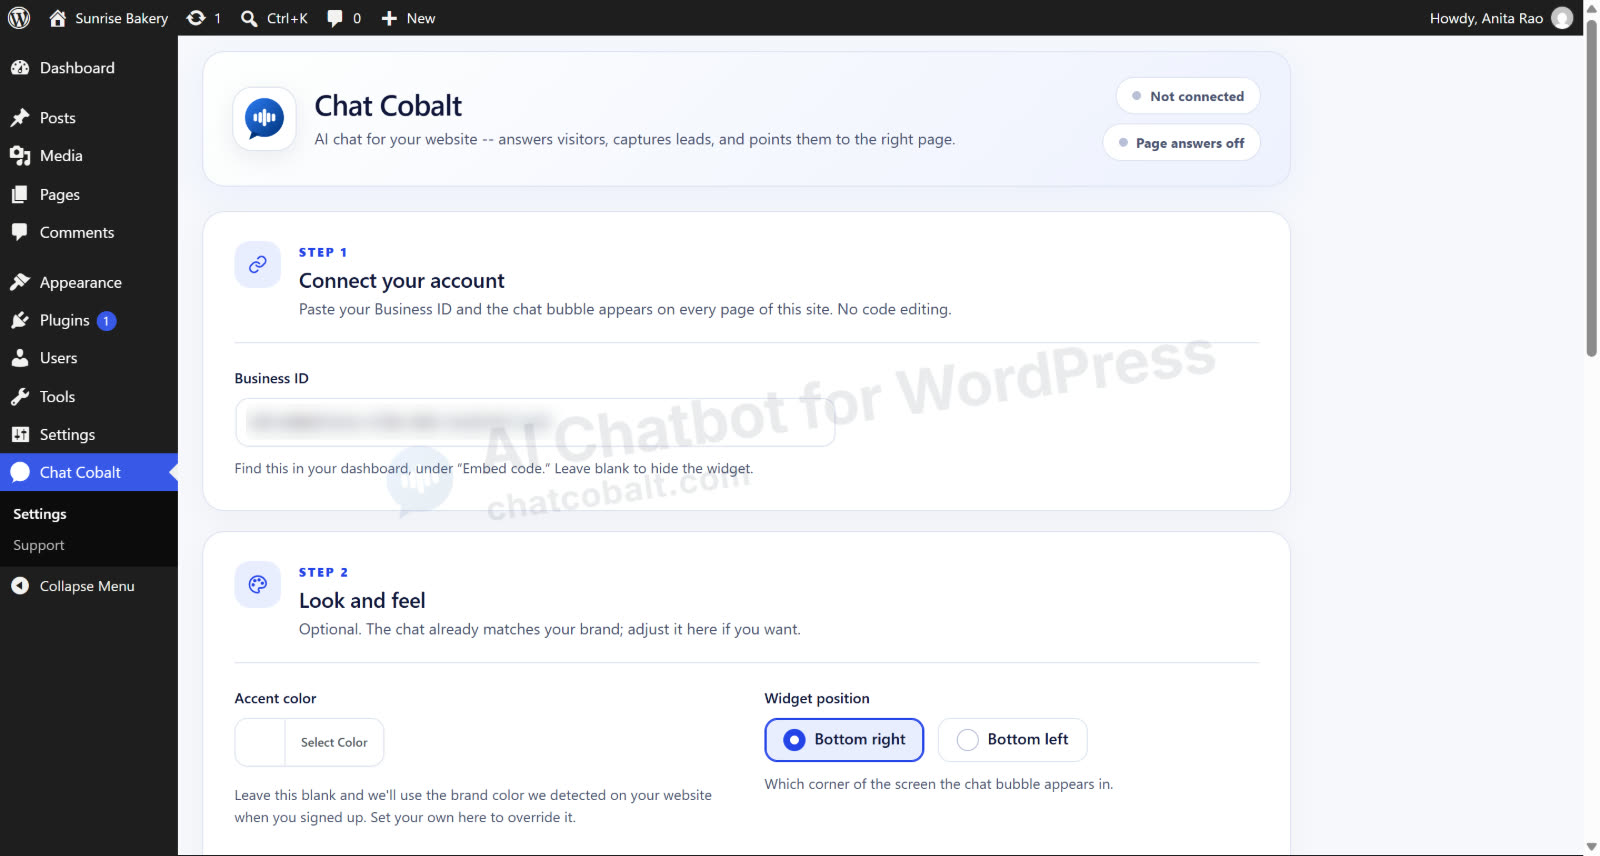
Step 17: Click Save Changes. You're live!
Scroll down and click Save changes. You'll see Connected to followed by your business name. Your AI chatbot is now live on every page of your website.
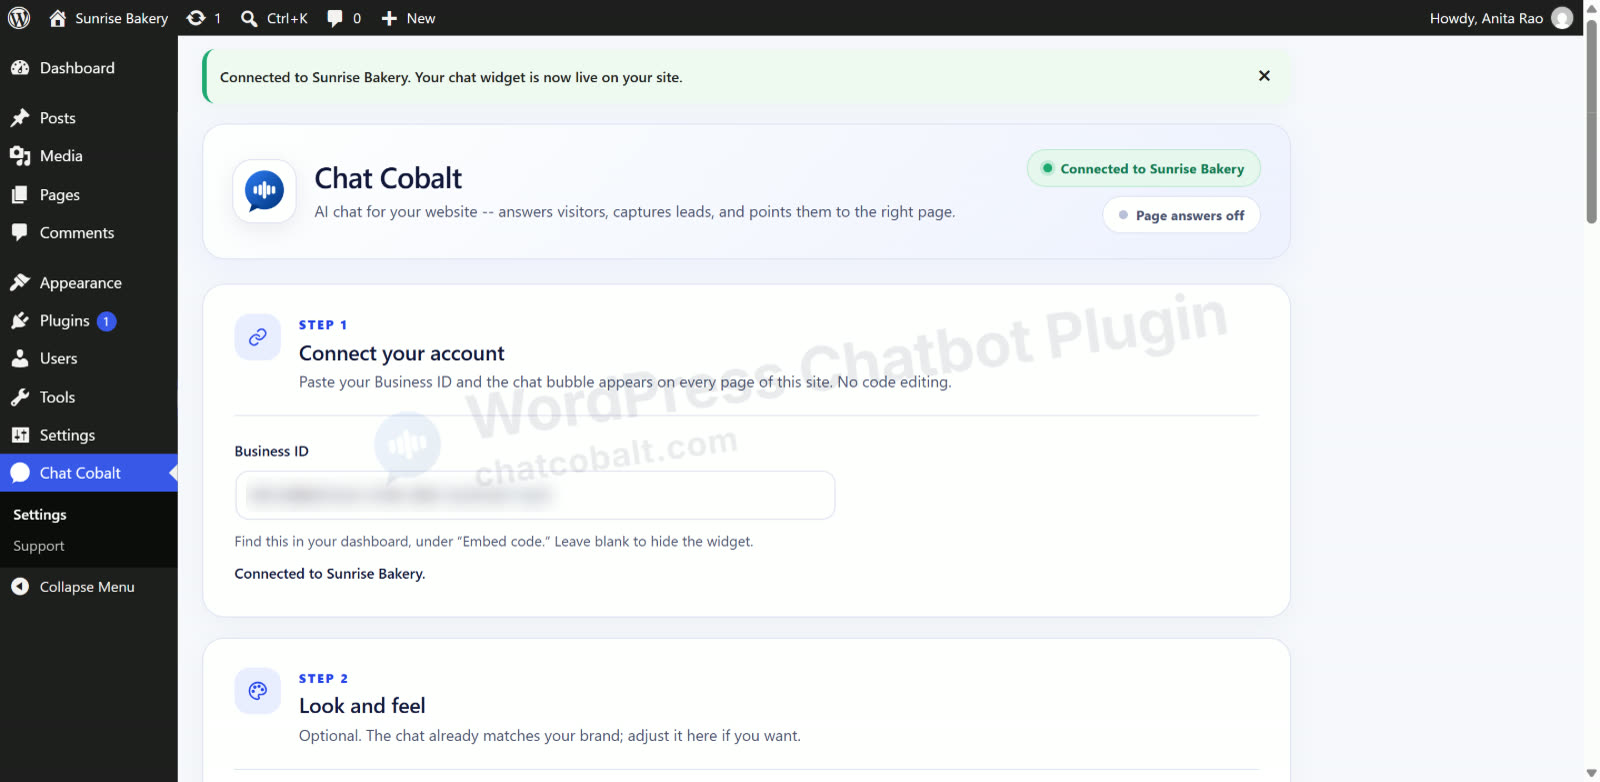
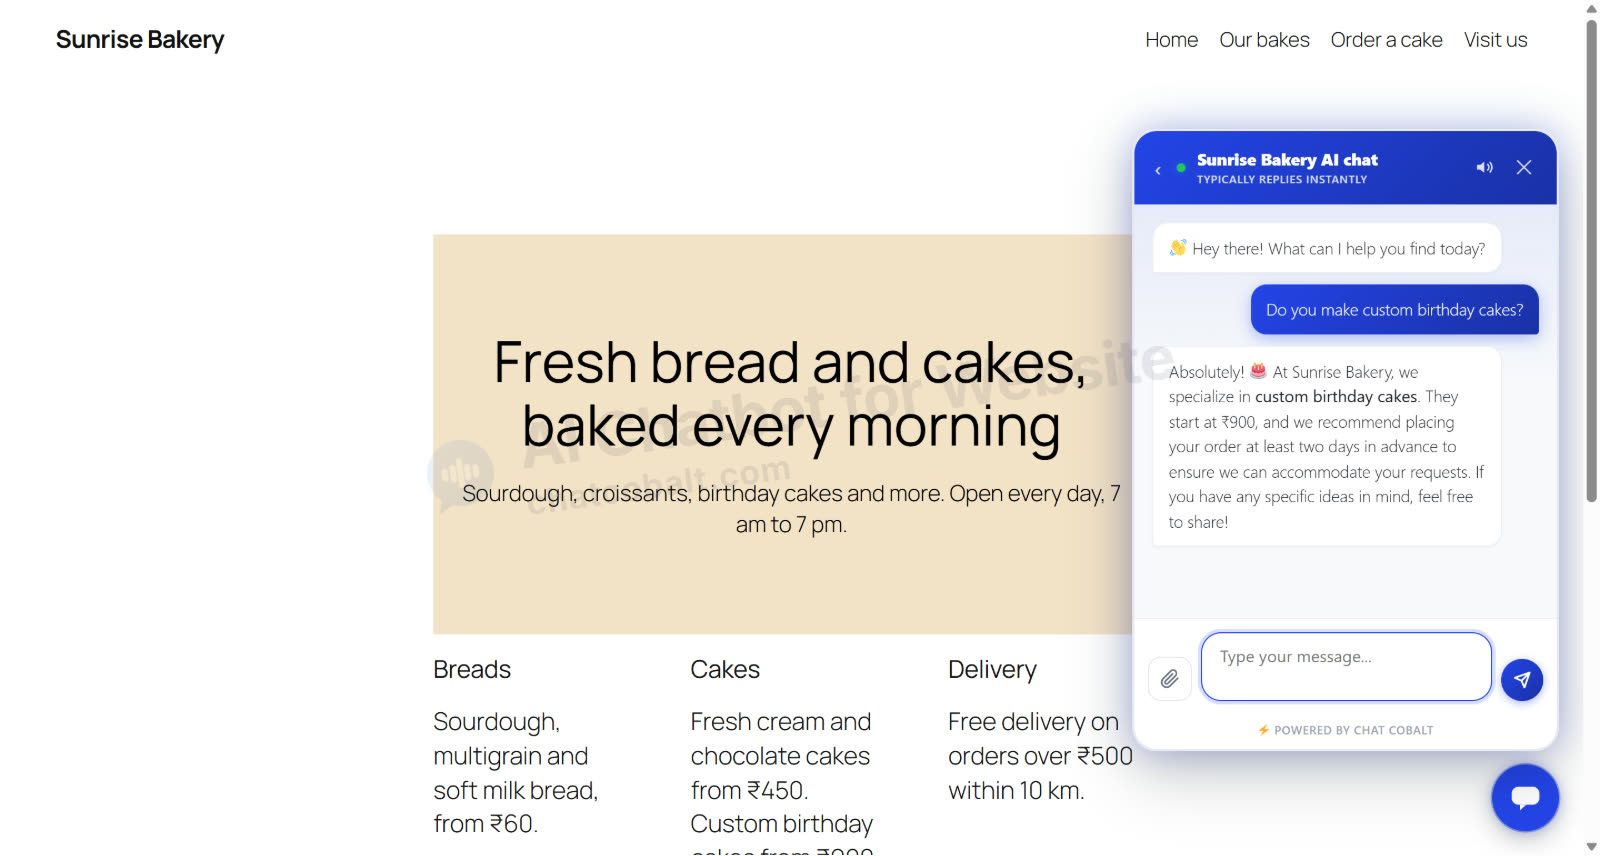
Part 4: Watch your chatbot answer customers
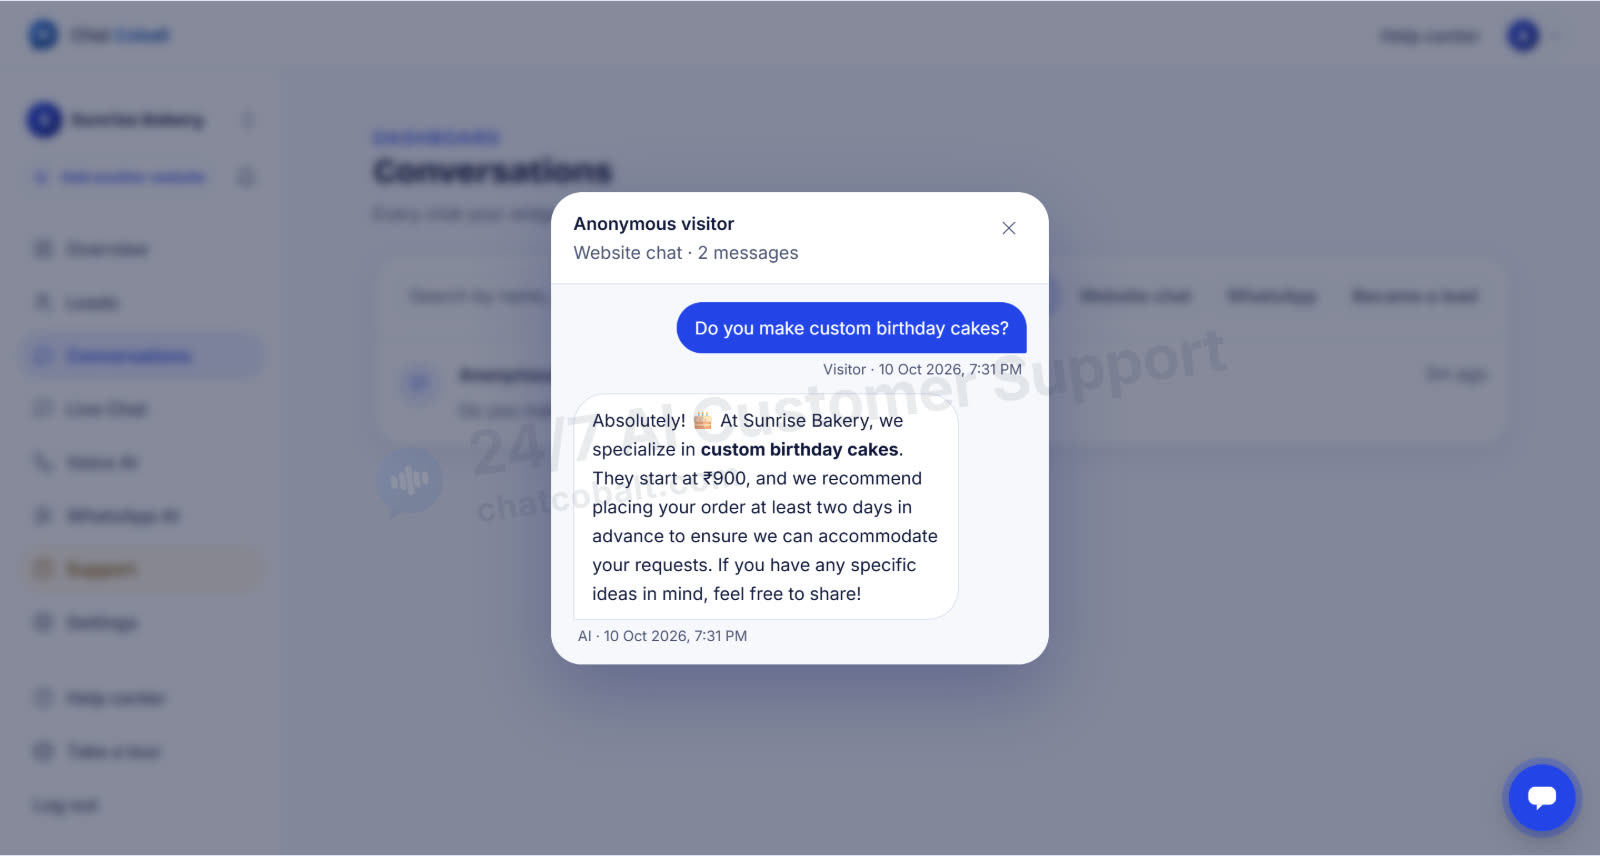
Open your website in a new tab. A chat bubble now sits in the bottom-right corner. A visitor asks "Do you make custom birthday cakes?" and gets a full answer in seconds, with your real price and how far ahead to order. No one had to type it.
Back in your dashboard, the setup checklist ticks itself off and tells you Your chat is live, so you know it really works on your website.
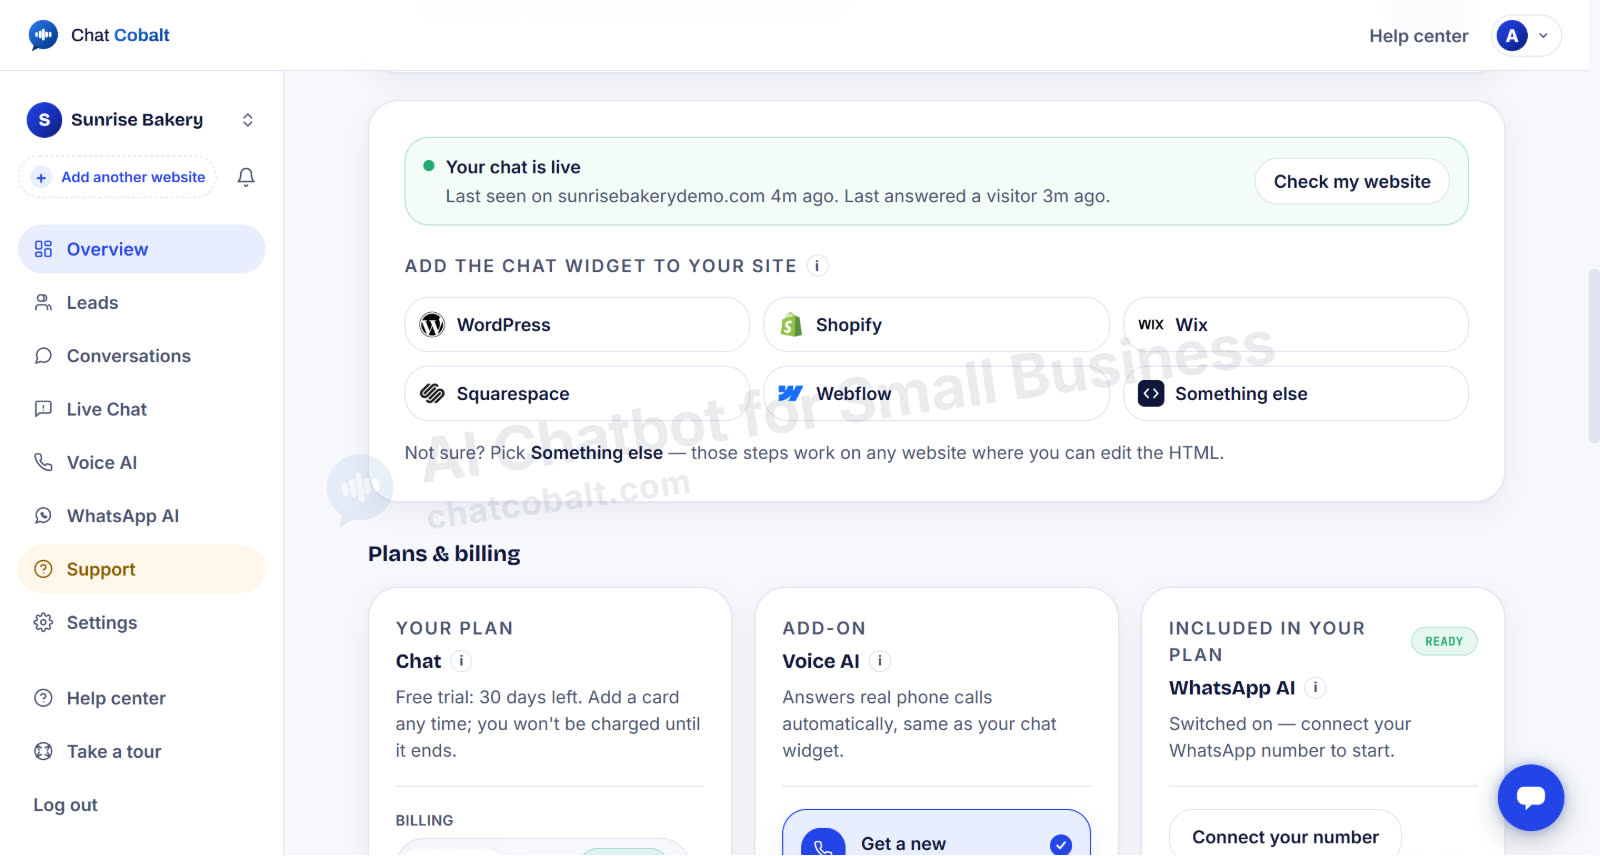
Every conversation is saved in Conversations, so you can read exactly what customers asked and what the AI answered. When someone leaves their name and number, it shows up in Leads, and you get an email.
What your WordPress chatbot does for you
- Answers questions 24/7, from your own business details, not made-up ones.
- Captures leads: names, phone numbers and emails, sent to your inbox.
- Lets you take over: jump into any chat yourself from Live Chat when you want a human touch.
- Points visitors to your pages: turn on Answer with your own pages in the plugin and the chat can link to the right page or blog post. See Answer with your WordPress pages.
- Works on WhatsApp too: the same assistant can answer your WhatsApp Business number. See WhatsApp AI.
Chatbot not showing? Quick fixes
- Clear your cache. If you use a caching plugin (WP Rocket, LiteSpeed Cache, W3 Total Cache and similar) or Cloudflare, clear it once after connecting, then refresh your website.
- Check the plugin is active under Plugins, and that the Chat Cobalt screen says Connected to your business name.
- Check your Business ID has no extra spaces. Copying with the Copy button avoids this, and the Connect button avoids it completely.
- Still stuck? Open Chat Cobalt → Support in WordPress and send us a message. Or read the full WordPress plugin guide.
Start your free trial
That's it: an AI chatbot on your WordPress website in under 2 minutes, without writing a line of code. Start your 30-day free trial. No credit card needed. Plans are on the pricing page.
Chat Cobalt is a product of Codebold IT Solutions.
Frequently asked questions
How do I add an AI chatbot to my WordPress website?
Sign up at chatcobalt.com and enter your website address, so the AI can learn your business. Then, in WordPress, go to Plugins, Add Plugin, search for Chat Cobalt, install and activate it, and either press Connect or paste your Business ID and click Save Changes. The chat bubble appears on every page of your site straight away.
Do I need to know coding to add a chatbot to WordPress?
No. The Chat Cobalt plugin adds the chatbot for you. You never edit your theme, paste code or touch any files.
Is the Chat Cobalt WordPress plugin free?
Yes, the plugin is free to install from the WordPress.org plugin directory. Your Chat Cobalt account starts with a 30-day free trial and no credit card is needed. After the trial you choose a plan on the pricing page.
Where do I find my Chat Cobalt Business ID?
In your Chat Cobalt dashboard, on the Overview page, under Add the chat widget to your site. Click WordPress and press Copy next to Your Business ID. If you use the Connect button in the plugin, you don't need to copy it at all.
Will the chatbot slow down my WordPress site?
The plugin adds one small script that WordPress loads at the bottom of the page, after your content, so your pages show up first and the chat bubble appears a moment later.
Can the chatbot answer with my own prices and opening hours?
Yes. During sign-up the AI reads your website and the details you add, such as products, prices and opening hours, and writes your chatbot's knowledge from them. You can change that knowledge anytime from your dashboard.
Is Chat Cobalt the same as ChatGPT?
No, it is a separate product, made by Codebold IT Solutions. It uses an AI language model in a similar way, but it is set up to answer only about your business, from your own information, and it saves every conversation and lead for you.
Chat Cobalt is a Codebold IT Solutions product.