Connect your WhatsApp number
Last updated: October 1, 2026 · about 20 minutes · no coding
This guide connects your WhatsApp Business number to Chat Cobalt, so the same AI that answers on your website answers your customers on WhatsApp. Most of it happens on Meta's website (Meta owns WhatsApp); the last step is pasting three values into your Chat Cobalt dashboard. Every screenshot has a red box on what to click; tap a picture to see it full size.
Before you start
- WhatsApp AI is switched on for your business: it is included in the Chat + Voice plan, or added from Dashboard → WhatsApp AI. See pricing.
- A phone number for your business that can receive a text message or a call.
- That number must not be logged into the WhatsApp or WhatsApp Business app on a phone. If it is, delete the WhatsApp account in that app first (Settings → Account → Delete account). Meta's rule: a number works either in the app or with an AI, not both. Old chats in the app are not carried over.
- A Facebook login. Meta may ask you to confirm it's you along the way; that is normal.
Create a free Meta app
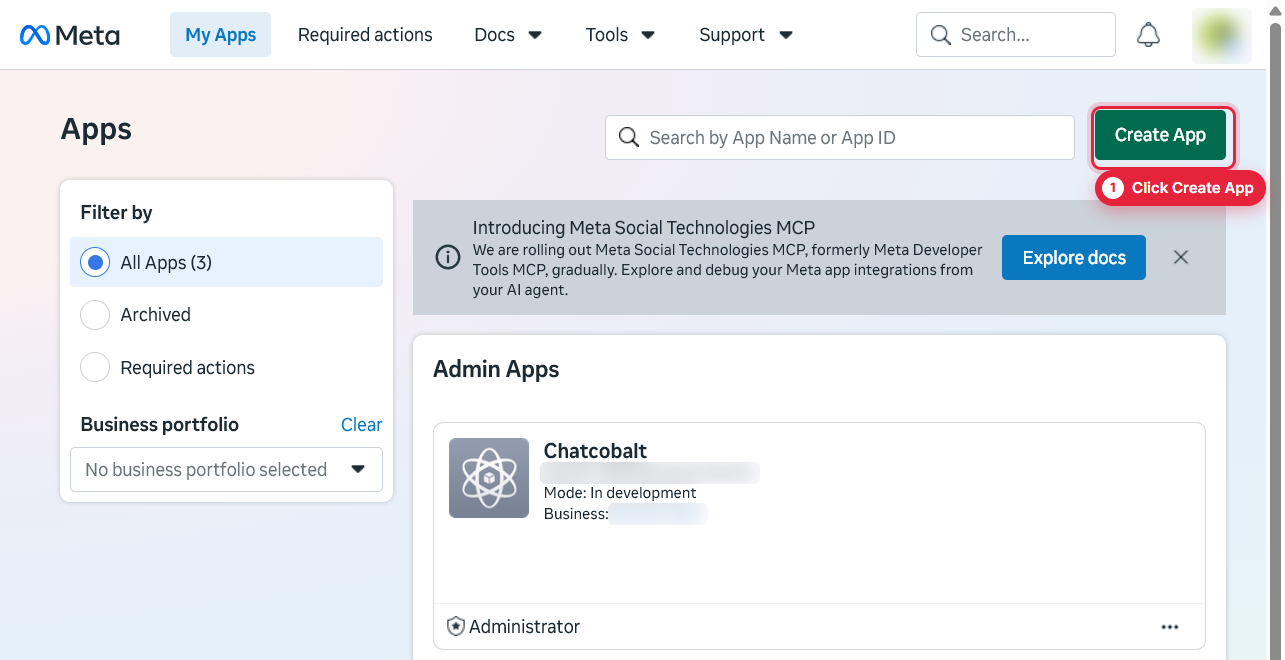
Go to developers.facebook.com/apps, log in with Facebook and click Create App.
Give the app a name such as “My Shop Chat” and click Next. The name can't contain “WhatsApp” or “Facebook”; Meta refuses it.
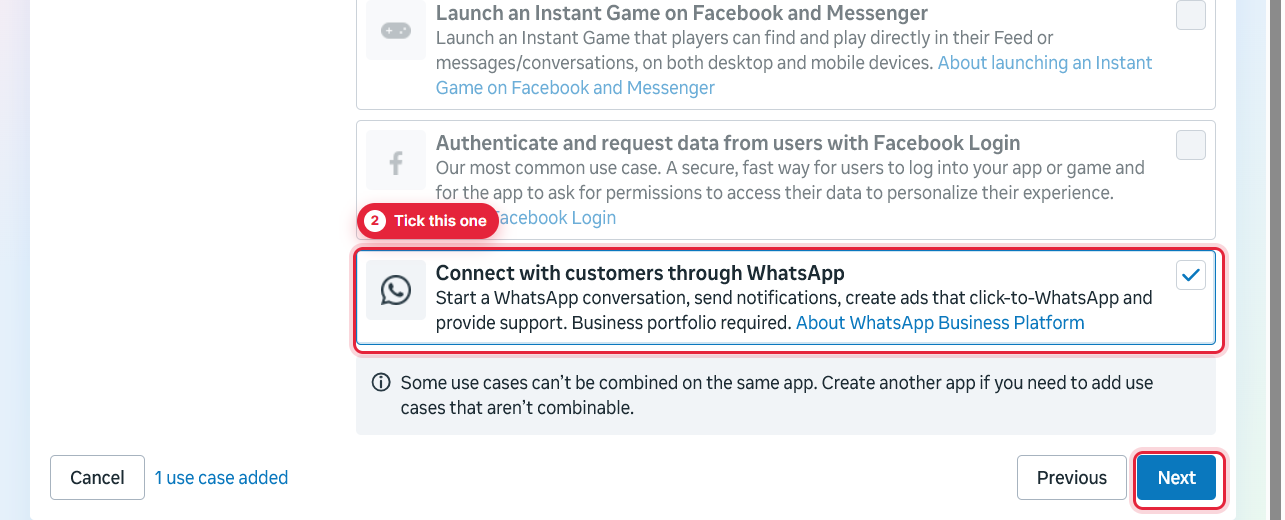
On Use cases, tick Connect with customers through WhatsApp and click Next.
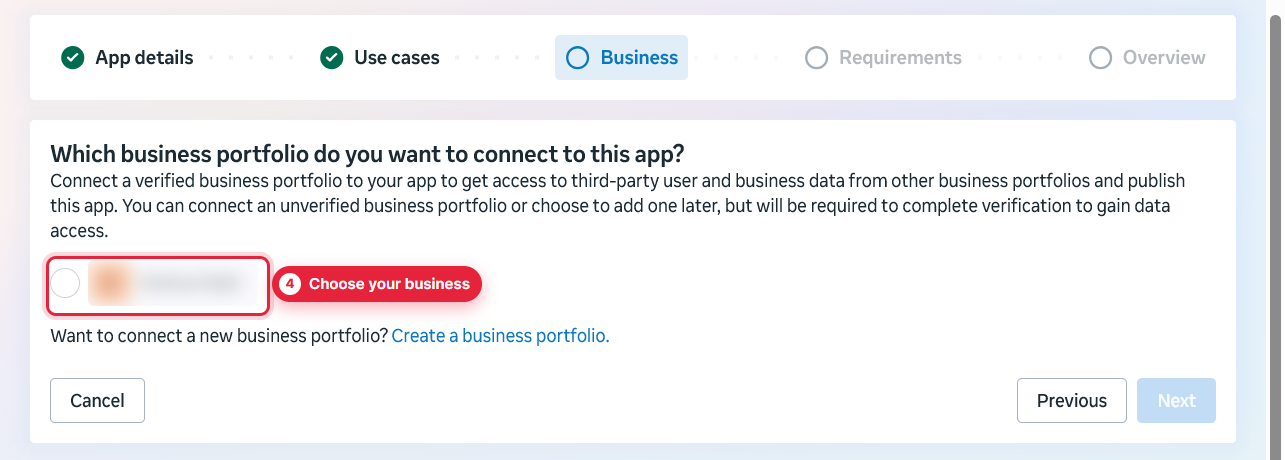
Choose your business portfolio, or click Create a business portfolio if you don't have one. Then click through the remaining screens to create the app.
Add your business number
In your new app open Use cases → Customize (it shows Connect on WhatsApp). Click Step 2. Production setup, open Register your WhatsApp phone number and click Add new number.
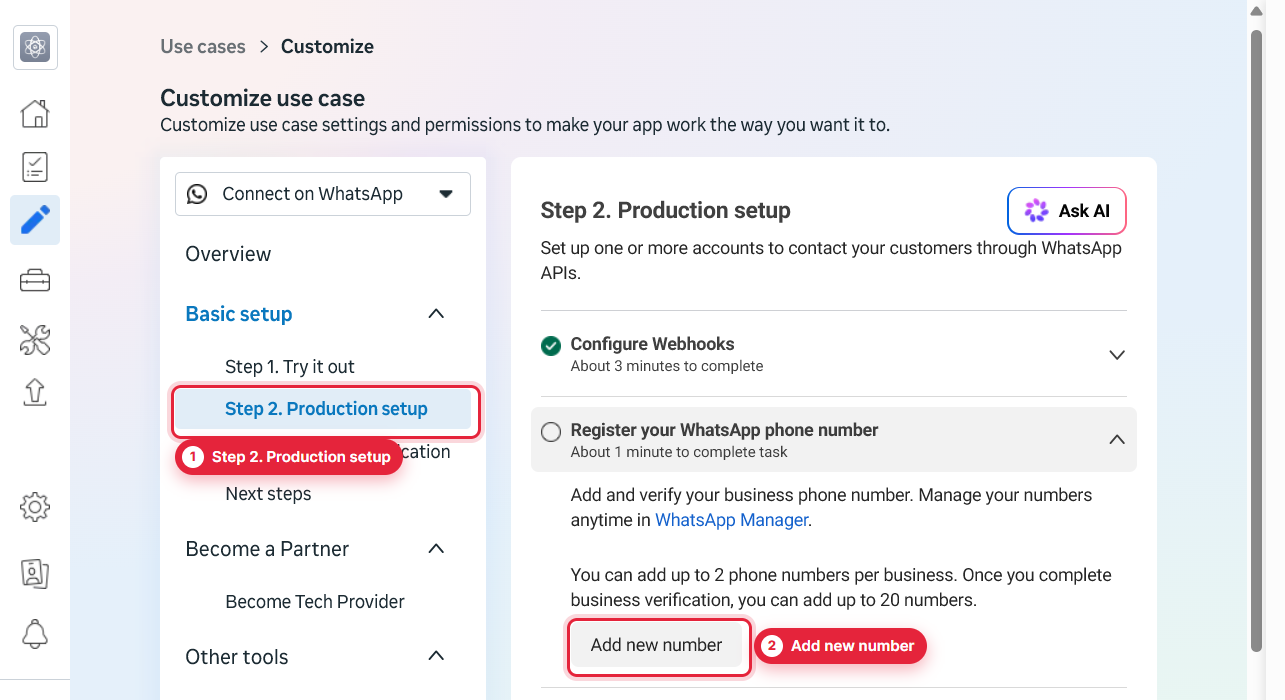
Meta then asks four things in a row: your business details, the WhatsApp profile customers will see (your business name), the number, and the code it sends to that number by text or call.
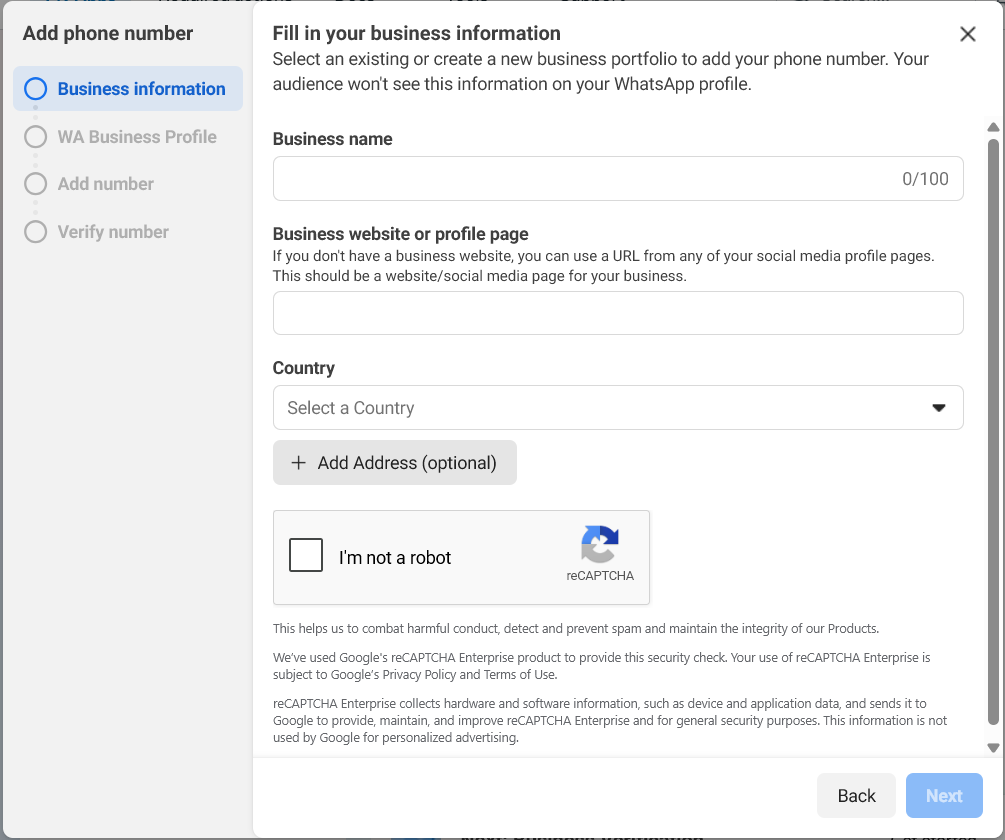
Meta reviews your display name, which can take a day or two; you can carry on meanwhile. “Add payment to send business-initiated messages” on the same page is optional: replies to customers within 24 hours of their message are free on Meta's side.
Create a permanent access token
The token lets Chat Cobalt reply from your number. Meta's quick token expires after a day, so make one that doesn't. Go to business.facebook.com/settings → Users → System users.
- Click Add, name it “Chat Cobalt” and choose the Admin role.
- Give it your app and your WhatsApp account, both with Full control (Meta calls this assigning assets). They then show under Assigned assets.
- Click Generate token.
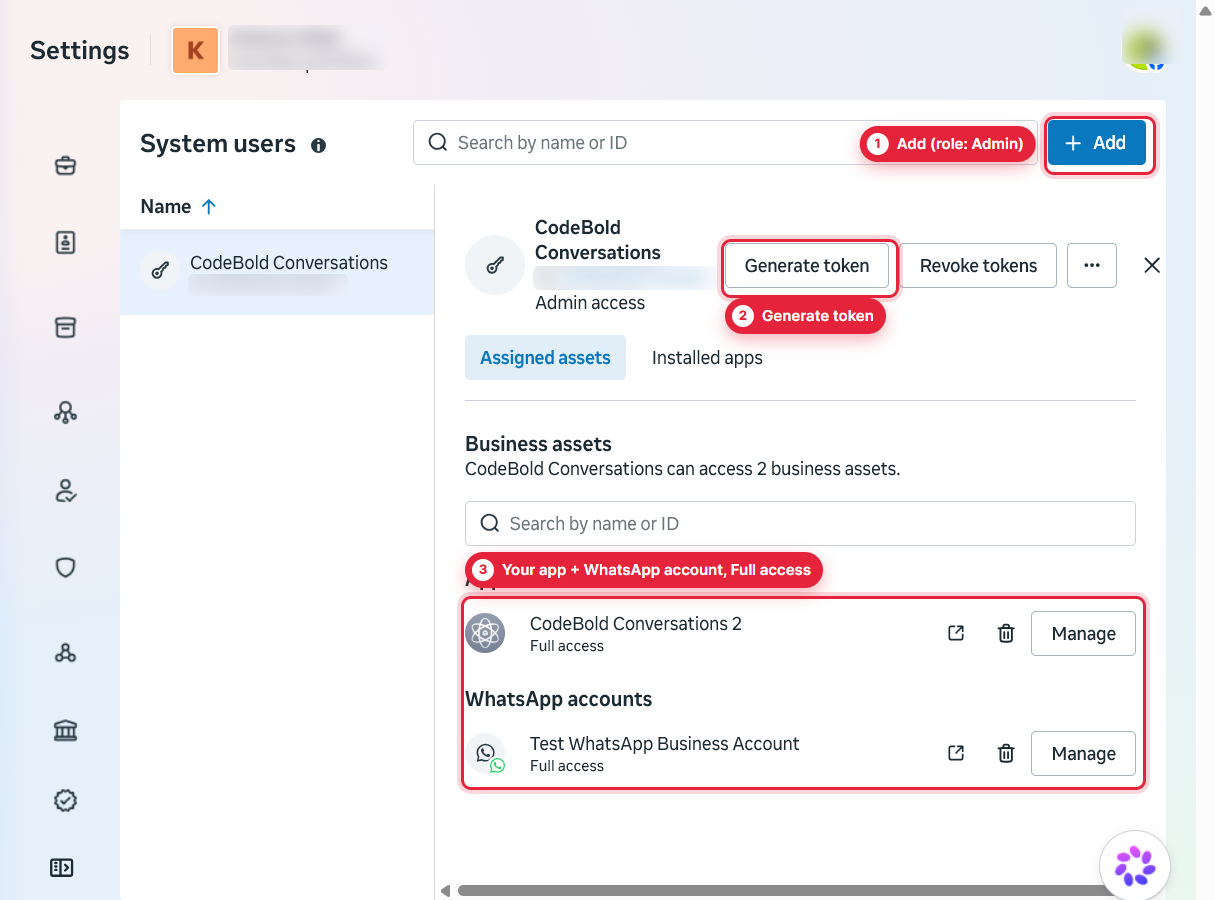
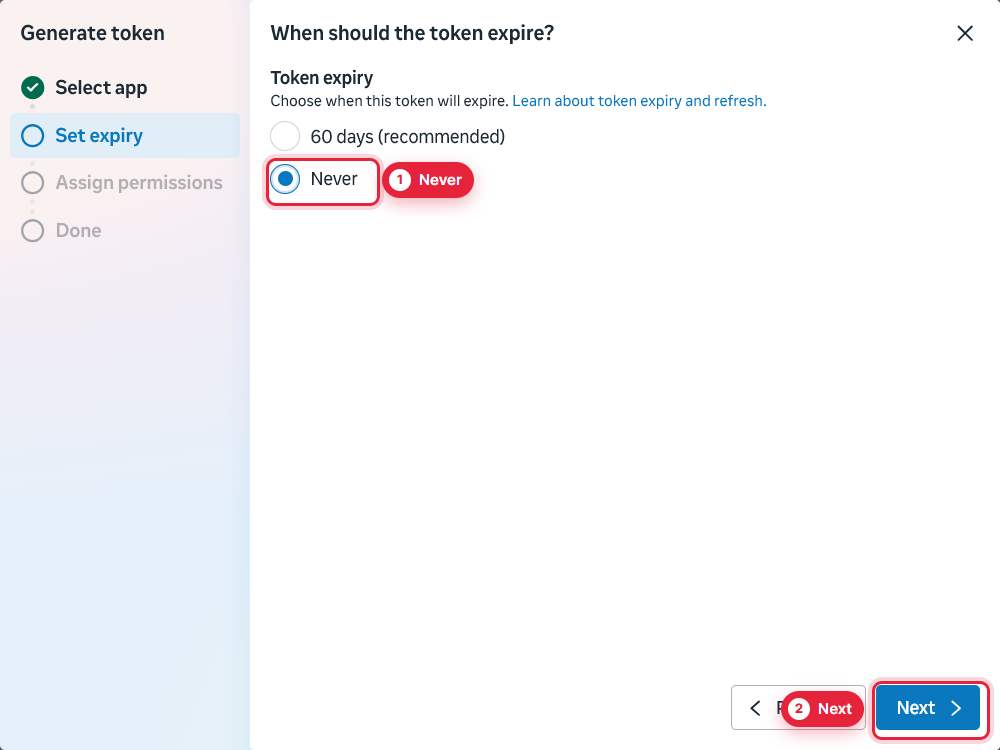
Pick your app, then set the expiry to Never.
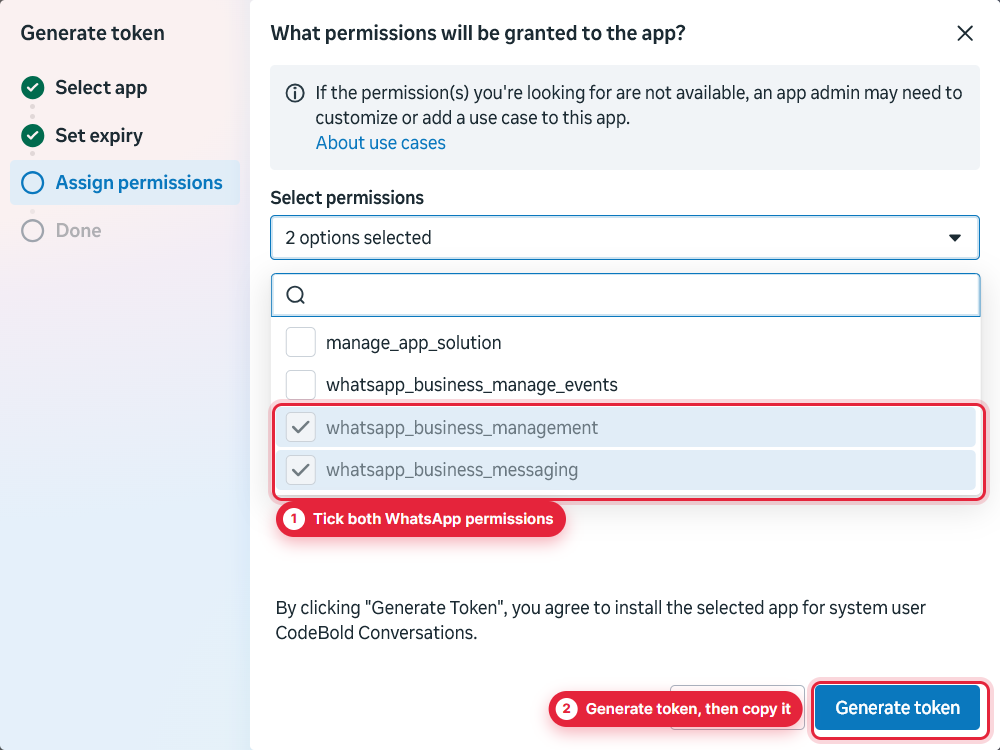
Tick whatsapp_business_management and whatsapp_business_messaging, click Generate token, and copy the token somewhere safe for Step 5. Meta shows it only once.
Copy two values and publish your app
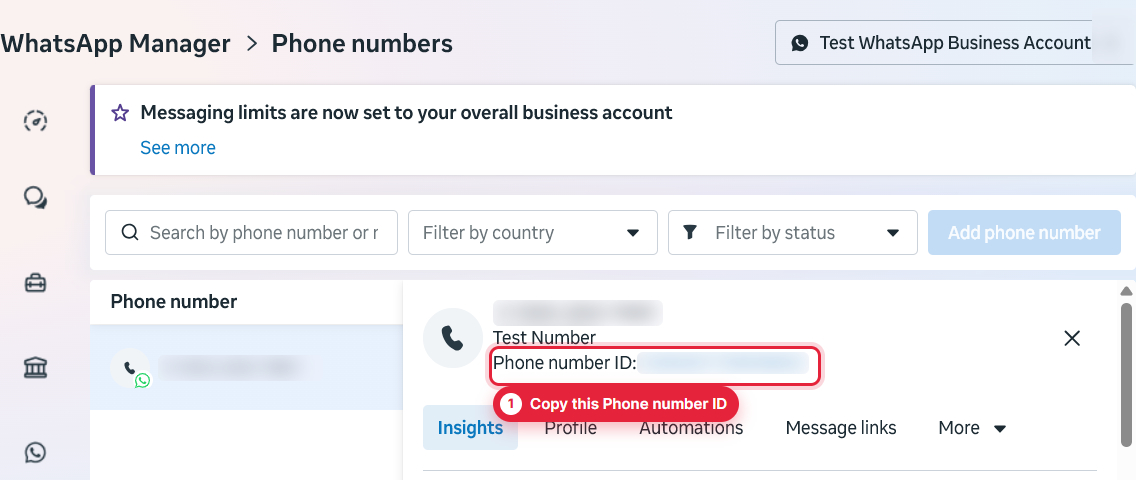
Phone Number ID. In WhatsApp Manager → Phone numbers, click the ⚙ settings icon next to your number. Copy the Phone number ID shown under it (a long number; not the phone number itself).
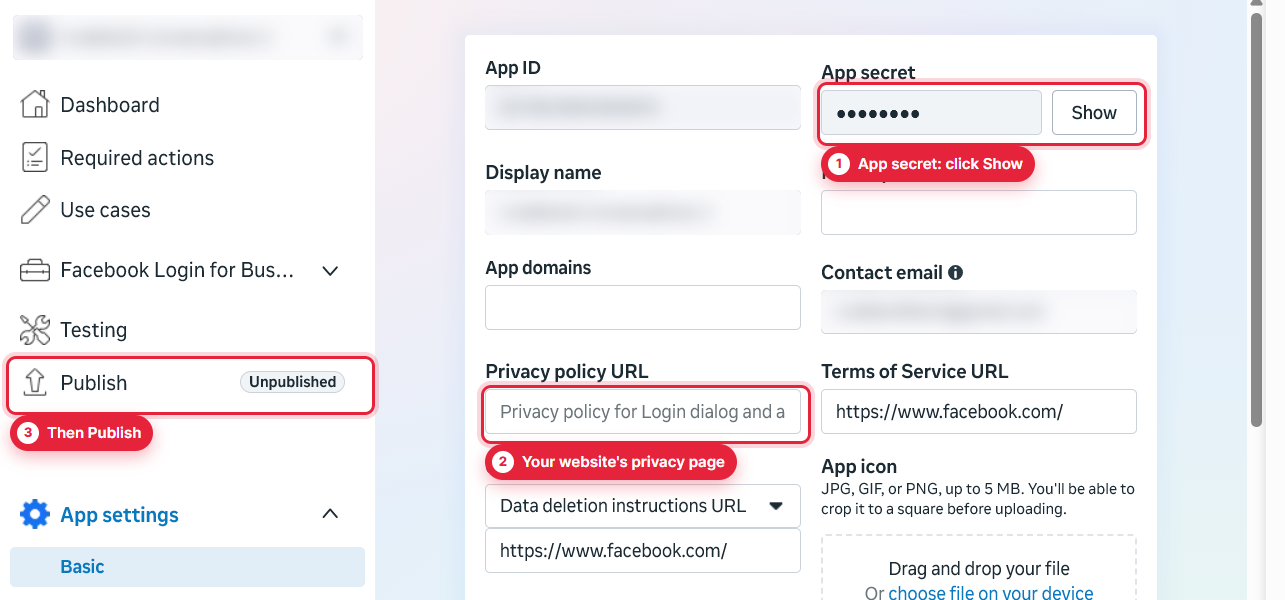
App Secret. Back in your app, open App settings → Basic and click Show next to App secret. On the same page, put your website's privacy page in Privacy policy URL and click Save changes at the bottom.
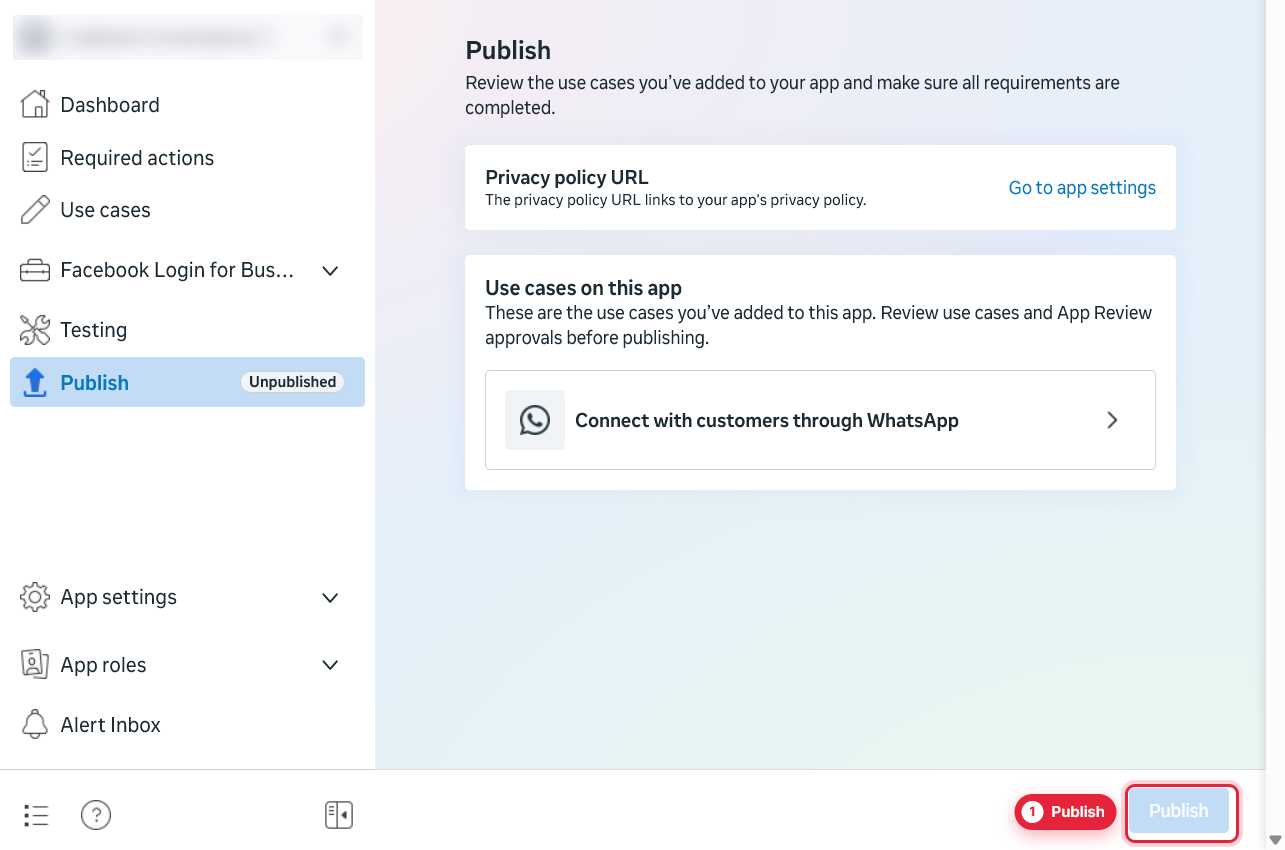
Publish. Click Publish in the left menu, then the Publish button. Until the app is published, Meta delivers no real customer messages, only test ones.
Connect it in Chat Cobalt
- Open Dashboard → WhatsApp AI in Chat Cobalt.
- Paste the Phone Number ID, the Access token (Step 3) and the App Secret, then click Connect.
- You should see “Everything on Meta's side is set up too”. With the App Secret, Chat Cobalt sets up Meta's webhook for you, so there is nothing else to configure.
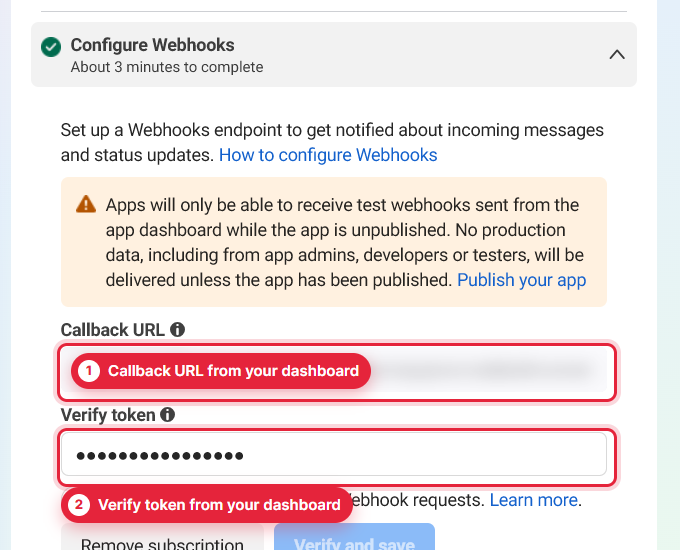
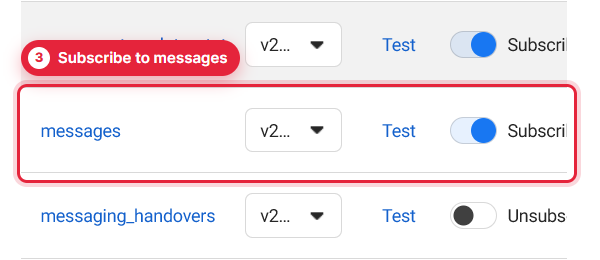
Connected without the App Secret? The dashboard then shows a Callback URL and a Verify token. In your Meta app open Use cases → Customize → Step 2. Production setup → Configure Webhooks, paste both and click Verify and save. Then, further down under Webhook fields, switch messages to Subscribed. Or simply reconnect with the App Secret and we do it for you.
Send a test message
From a different phone, send “Hi” to your business number on WhatsApp. The AI replies within seconds. The chat appears under Conversations and Live Chat in your dashboard, and the customer is saved as a lead with their WhatsApp number.
Day to day
- Reply yourself: open the chat in Live Chat and type. The AI steps back for that customer until you hand it back.
- Pause the AI: Dashboard → WhatsApp AI → Pause AI replies stops it answering on WhatsApp until you resume.
- What it knows: the same business information as your website chat. Update it under Account and both channels learn it.
- WooCommerce shops: turn on Chat Cobalt → WhatsApp orders in the WordPress plugin, and customers can ask “where is my order?” and get their real order status.
If something isn't working
- The AI doesn't reply. On Dashboard → WhatsApp AI the badge should say AI answering. “AI paused” means press Resume; “Add-on off” means WhatsApp AI isn't switched on yet. If it says AI answering, check the app is published (Step 4) and messages is subscribed (Step 5).
- It worked, then stopped after a day. That was Meta's temporary token. Make a permanent one (Step 3) and paste it with Update token.
- “Needs attention” with a red message. That is Meta's own error. It is almost always the token: generate a new one (Step 3) and use Update token.
- Meta says the number is already registered. It is still logged into the WhatsApp app on a phone. Delete the account in the app, wait a few minutes, and add it again.
- Meta won't accept the app name. Remove “WhatsApp”, “Facebook” or similar words from it.
Still stuck? Ask the chat in your dashboard, which can see your WhatsApp connection status, or open a ticket under Dashboard → Support and a person will help.